website home | road-bike section home | my chain-lube method | bike potpourri
a road cycling potpourri page, with my early cycling history (brief), plus musings on industry progress,
unexpected solutions and facts, physiology, safety, science, and terminology
Subjects in bold should help find things faster. I tried to group related stuff together. For years, higher
priorities delayed the writing of this page. Now in 2024, although I'm a very active cyclist, I haven't been watching the industry
as closely as I used to, so although I believe everything is factual, there may be parts that are not quite up to date. I'll be
editing for clarification, new information, or additions.
On this page:
I started in serious road cycling in 1976, in high school. Before that, I had a yellow
Montgomery Ward (department store chain, competitor to Sears)
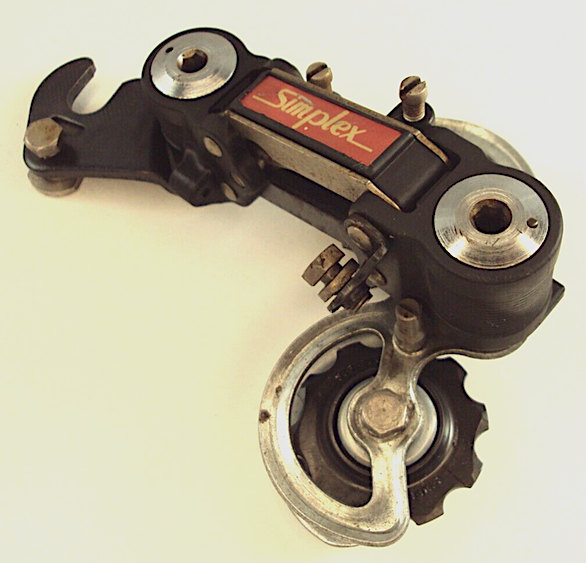
10-speed with 26x1¼" tires, bike probably made by Huffy. It had Simplex plastic derailleurs and stem shifters which gave
Simplex a black eye that it never recovered from. (The goal was apparently to save weight.) If you're old enough, you probably
remember this one:
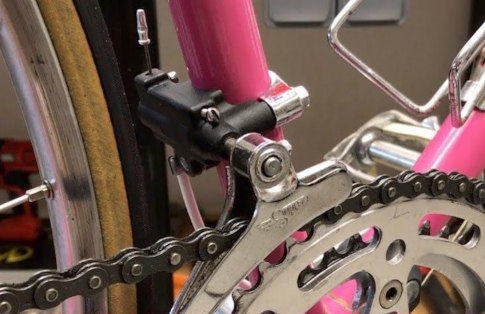
The front derailleur just had a rod that went straight in and out, with no parallelogram, like this one (but my bike was yellow, not
pink, and my crankset and rims were steel):
But as I frequented the local bike shop, the manager could see I had good mechanical aptitude, so he hired me with a plan of on-the-job
training. My first task there (although I probably did not get paid for this one) was to do a complete overhaul on my own bike.
He himself had a 1976 Schwinn Super Le Tour, which was the lowest on Schwinn's scale of serious road bikes (above the Traveler, Varsity,
Continental, and Le Tour). It had a 4130 CrMo frame. Retail price was $230 (like $1300 in late 2024); but then he upgraded to
full Campagnolo Nuovo Record, and sew-up (tubular) tires. He let me take it for a test ride, to open my eyes. I couldn't
believe it. Riding this upgraded Super Le Tour felt like someone was pushing me; and of course the handling was also far better than
what I was used to.
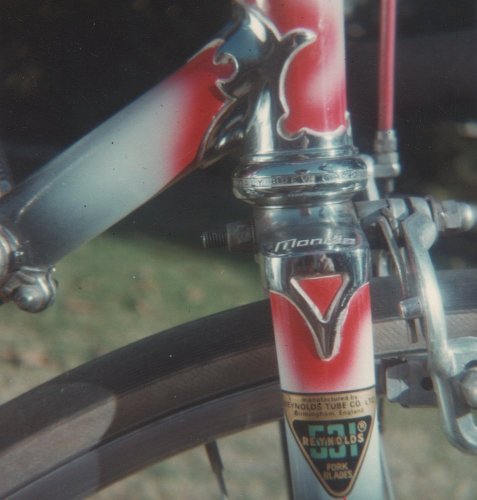
Soon I had built up a better bike, with components I chose and ordered, then soon moved up further to a 1977 Swiss-made Mondia Special
frame, with Reynolds 531 double-butted tubing throughout. That bike had a marvelous feel and responsiveness, like it just wanted to
be part of you. The 21st century definitely does not have a corner on great-handling bikes! Mondia also had some really
flamboyant paint jobs. I got this black one that faded into white and then red at the lugs:
I thought it would last my lifetime. Unfortunately I broke it at the bottom of the seat tube. I had another tube put in it,
and I broke it again, from sprints. (And no, there was not a speck of rust in it.) This was all in under 20,000 miles.
Yeah, steel fatigues, and breaks. More about that further down, in the section about carbon-fiber durability.
About that time (1977), I also owned a Bridgestone Kabuki Diamond Road, Kabuki's top-of-the-line racing bike, with tubular tires and
full Dura-Ace which was obviously a direct copy of Campagnolo Record. List price of the bike was $450; but since I worked at the
bike shop, I got it for dealer cost, which was $250 IIRC. I don't remember exactly why I bought it. I didn't keep it very
long before selling it at a $40 profit. Yeah, the dollar was a lot bigger back then.
Friends saw their 16th birthday as time to get their driver's license. Not me. I didn't get one until more than a year later
when my parents required me to drive a carpool of kids in their car to high school so they didn't have to do it. I didn't have any
desire for a car of my own until I became interested in my future wife at age 22 and I couldn't take her on dates on my bike. I
bought a car for that, but continued riding bike to work. Our sons have similar stories.
We don't really think about it, but when newish cyclists see our smoothness, our spin, how we appear to be at home on the bike and have
good command of the bike, they instinctively respect the apparent experience. They often ask me how many years I've been riding, and
I tell them I started seriously in 1976. (Unfortunately I took 13 years off in the 80's and 90's, which I'm not proud of.) It
hit me last week that it has been almost 50 years since I started! I climb the local canyon roads faster today than I did in my early
years though. I'm not quite as strong, but my endurance is good, and I don't have as much weight to lift up the hill. When I
graduated from high school, I weighed 18 pounds more than I do today, and none of it was fat. (My bike back then weighed five pounds
more too, but I carried less water—which sometimes got me in trouble!)
(BTW, this is all for road bikes. Mountain bikes didn't exist yet when I started, and I consider it a different sport, different field,
one I'm not involved in.) Equipment has changed a lot since the 1970's, mostly for the better (but not all, as I get into further down):
- Tires are much better. I got really fast at fixing flats, not just because I worked in a bike shop, but
because I got so many flats of my own. I had inner tubes with 30+ patches on each. (People think you have to throw it out
after it gets a few; but why? The patches are the strongest part of the tube!) Today with Conti GP4000s and 5000 tires,
I probably average a couple thousand miles between roadside flat fixes. Of all the tires on the market, these have some of the
lowest rolling resistance and longest life, and yet their Vectran (not Kevlar!) breaker layer, which is inside and does not get worn
down as the tread wears, gives excellent puncture protection. I've even pulled a box staple out of my tire, and didn't have to
fix a flat, because it didn't penetrate the Vectran breaker layer. (Most tires now are folding too though, which I'm not crazy
about when it comes time to mount them, because folding tires are always trying to curl up on you while you're trying to mount them,
whereas tires with wire beads keep their shape.)
- Rims are stiffer and stronger, so wheels don't taco so easily, even though we use fewer spokes now. (In the
1970's, all 26", 27", and 700c bike wheels still had 36 spokes, except tandem wheels which might have 36, 40, or 48.)
- Dual-pivot brakes, with Kool Stop pads, on machined sidewalls,
give me more braking than I could ever use, even in rain. Shimano's stock pads are garbage though. Kool Stop's pads
give better braking, don't get the metal bits embedded in them, and don't tear up the rims. Here's a pair I wore out, and you
can see there are no metal bits embedded in them. I never had to dig any out either.
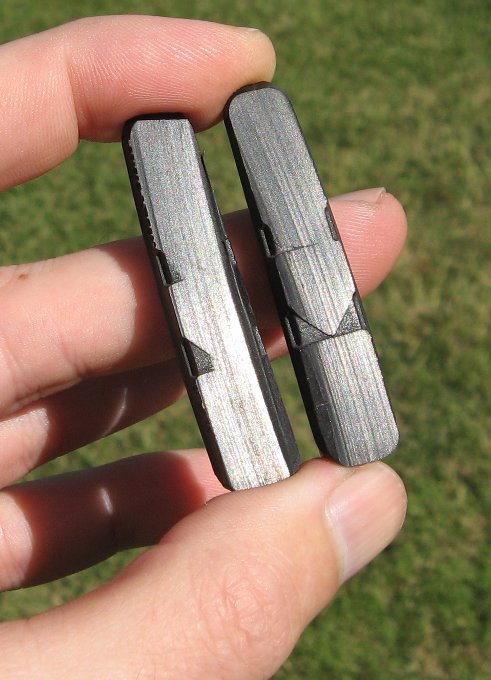
The lines are from the machined rim braking surfaces. Just consider it standard practice that when you get Shimano rim
brakes, you swap out the pads for Kool Stop ones. On our tandem, with 350 pounds gross weight, I can lock up either
brake, even the front, with one finger on the lever, wet or dry. (And no, it doesn't take a couple of turns of the wheel to
squeegee off the water; because when I found out, quite by accident, that I could lock it up like that, we were in water that was
more than rim deep.) I've never noticed any fade either.
- Most bottom brackets now last longer, particularly ones with bearings that are outboard of the frame's BB shell, as
that allows more ball bearings, and it also makes for less leverage force on them. I especially like the GXP type which has no
requirements of critical adjustments, including pre-load. (ISIS type, with its closely spaced internal bearings, is terrible
though. Those things don't last at all. I think OctaLink was similar. When our younger son weighed only 110
pounds before he was done growing, he was wearing out an ISIS BB every 3,000 miles.)
- Handlebar stems, besides being stiffer, make it easier to swap out a stem for a different length (unless the bars
and stem are integrated, which I'll get to below). The older type required taking the brake lever and all the tape off one
side of the bar in order to slide the stem off the bar.
- Clipless pedals are much better than the toe clips and straps we had in the 1970's which were never tight enough
unless they hurt. Cleats had a slot that the edge of the quill pedals fit into, so you could pull back; but pulling up
required that the strap be tight enough that stretch would not let you disengage the cleat and pull out. There was the much
deeper Uniblock cleat that went down over the barrel of the pedal and held better (and you had to loosen the strap a lot more to
get out); but Look came out with their Delta system at about the same time, which meant that Uniblock never took off. I have
not been able to find a picture of the Uniblock cleat online. Please send me a link or a picture if you have one.
- Aerobars improve aerodynamics, and, if fit correctly (which they usually aren't) and you condition yourself for
them, they relieve soreness and fatigue in the wrists, elbows, shoulders, even back. There was the Zzipper brand handlebar
fairing, and I did use one for a while, and it was even better aerodynamically; but the problem I had with it was that the mounts
kept cracking and needing repair or replacement. (I have more about aerobar fit further down.)
- Lights! Wow—Lights have improved so dramatically! What we had in the 1970's was either basically
a miserable version of a flashlight with an incandescent bulb, or generator lights which robbed a lot of power and of course were
dim when you were climbing, went out if you stopped, and you were constantly blowing out bulbs if you were fast. This picture
shows a 1970's Wonderlite:
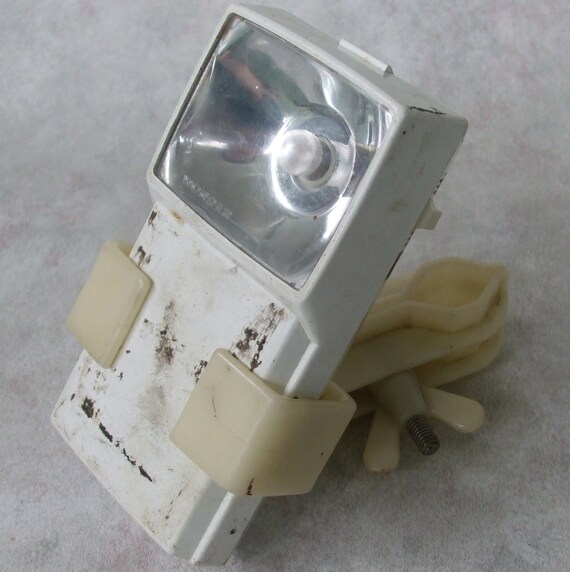
The only good thing about it was that it had a ball joint (not visible in the picture) that let you achieve and lock in the optimum
aim.
- Freehubs solved the problem of breaking axles, especially as freewheels went from 5-speed to 6 to 7 and even 8,
because these put the right-side wheel bearings farther and farther from the dropout, causing more axle-breaking leverage.
With the freehub body, the hub's right-side bearings were in the freehub body itself, closer to the dropout.
- Shifting has gotten easier, and the jumps from one gear to the next are not so big. So many things have
contributed to this improvement. Grant Peterson, the beloved retrogrouch of
Rivendell Bicycle Works, said indexed shifting brought a lot of shifting
improvements even though he doesn't agree that indexing itself was particularly one of them. There were shifters integrated
with the brake levers as far back as the 1930's; but making indexing work work well required several things that came later:
- ramped and mated cogs on the cassette (or freewheel, but freewheels were going out as indexed shifting was coming in) so
the chain is helped up onto the next cog only where it would mesh properly with the next cog's teeth;
- the chain being more flexible sideways, which is why modern chains have only 8 pieces per link instead of ten;
- mated, ramped, and pinned chainrings;
- the front derailleur cage is shaped appropriately, rather than just having two parallel planes.
As for "brifters," ie, integrated brake lever / shifters, I have them on the tandem and they
work perfectly, but I never became enamored with them. I prefer indexed shifters on the ends of the aerobars. Even
on the down tube (the old-fashioned way) is not bad, although it's not my first choice. Down-tube indexed shifters have the
most snappy response, because there's almost no cable housing. They're more reliable than brifters and pretty much
maintenance-free, and you can operate both at once with one hand while braking with the other. I have 9-speed Dura-Ace
indexed down-tube shifters on my errand bike, 9-speed Dura-Ace indexed bar-end shifters on the bike I ride most, and 7-speed RSX
(which came before Tiagra, IIRC) brifters on the tandem.
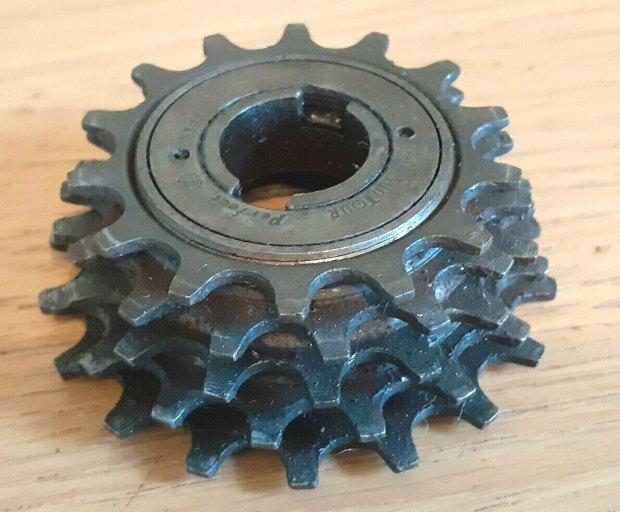
You might find this amusing: This is a 5-speed, 14-18 "corncob" close-ratio freewheel for crit racing (13T cogs didn't
come until later, like late 1970's, not to mention 12T and 11T):
- Carbon fiber is a better frame material than steel in almost every way:
- It basically doesn't fatigue,
- it doesn't rust or corrode,
- it doesn't add its own resonances (which is why it feels smoother, even if you have a stiffer frame),
- the fibers can be oriented to give strength where it's needed without wasting material to strengthen it against forces it
won't get in riding (like crushing a tube),
- layers of CF fabric can be added to thicken areas that need it without adding weight to areas that don't; and
- its strength-to-weight ratio is a lot better.
If steel were a better material and sacrificing strength or durability were an acceptable tradeoff for reducing weight, they would
have kept using steel, just less of it.
- Clothing is better, especially shorts which are more stretchy and have a synthetic pad instead of the real chamois
skin we had in the 1970's. Jerseys are made of material that fits better, without so much of the wrinkles that flap in the
wind and waste energy.
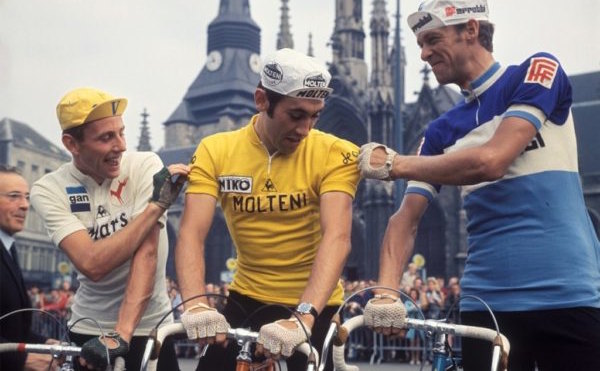
- Helmets: All we had in the 1970's was those worthless leather strips that got called "hair nets," except the
one Bell brand "Bell Biker" which looked more like a skateboarder's helmet. (I expose some myths about helmets further
down.) I never wore a helmet until 1999, only the little cloth caps with a 1½" bill that was always flipped up, like
you see Eddy Merckx wearing here:
 .
.
- Water bottles today come up to 32oz which is twice the volume of most bottles in the 70's, and every frame also
has the threaded mounts for two cages, one on the seat tube and one on the down tube. (Note however that many sloping-top-tube
frames don't give enough room for the tall 32oz bottles in the seat-tube cage, even with a side-entry holder.)
Additionally, we can add holders for two more behind the seat.
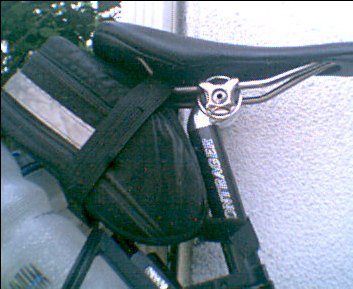
- Reversible seat posts are nice for TT bikes and those of us who ride in that posture. I'm a spinner, and I
never could get comfortable until there were seat posts that could be turned around to put the clamping mechanism in front
of the centerline of the post rather than behind it. It's not about the distance to the bars, but rather that I always
wanted the crank farther back, relative to the seat. I know that won't meed the UCI's requirements for racing, but I don't
care. The UCI has a long history of really stupid rules.
This is where the modern stuff went wrong. And BTW, Wayne has a Rumble video channel
Waynosfotos where he shows various problems with the industry's new
stuff which it uses to try to grow in a flat market by convincing us that what we have is not adequate and we need to buy the latest thing,
and it runs the prices out of sight, and then it laments that it has warehouses full of bikes that don't sell!
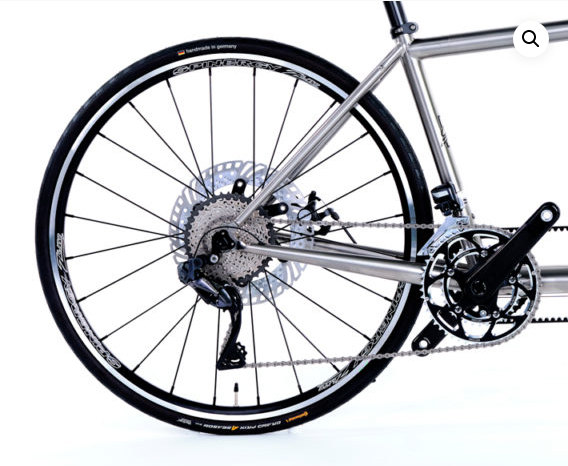
- disc brakes: These seem to have come about for two reasons, one being that they look cool so people wanted
to think they're better and the market demanded them, and secondly, when carbon rims came about, rim brakes didn't work well on
carbon rims. So what's wrong with disc brakes, besides the fact that they don't give any better braking (on machined aluminum
rims) than what I described above?
- Disc brakes put a tremendous amount of torque between the hub and the rim, unlike rim brakes which put no torque at all
there. (There's also torque between the two flanges, since the brake is on one side.) I've seen video of a
front wheel practically exploding, because with all this torque, one spoke broke, which passed more stress onto adjacent
spokes, which in turn broke, and so on, and about ten the spokes in the wheel popped within a few thousandths of a
second. The rider narrowly avoided crashing.
- Another man, on his YouTube channel, said he was having to replace his discs twice a year, because of delamination.
The manufacturer put aluminum on the inside to conduct heat better, and steel on the outside to handle the wear better,
and with the temperature cycling and the different coefficients of thermal expansion, they delaminated.
- discs warping, from the heat
- howling noise: I was watching the TdF racers this year (2024) on a descent with lots of hairpin turns to brake for,
and so many of the bikes' brakes were just howling, despite having the best mechanics on the planet. I've seen other
videos of this too, and heard it personally on rides when I was close to others who were braking with disc brakes.
A friend who has disc brakes was just telling me about having an especially bad case of that problem last week in high
humidity.
- short pad life: My Kool Stop pads on rim brakes give me 25,000 miles' life, with a fair amount of twisty descents
and riding in traffic. I've seen reports of disc-brake pads needing replacement every 1,000 miles.
- The alignment is more critical to prevent rubbing, particularly if the wheels are removed and re-installed frequently.
- Disc brakes are heavier and have more wind resistance than rim brakes. Consider that because of where the
braking is applied, the fork has to be stronger to prevent twisting the end of it off, it has to be stiffer to prevent
pulling to one side when braking hard, and these things require more weight. Similarly, the left-side seat stay and
chain stay have to be stiffer and stronger. The wheel, particularly the front, has to be stronger to withstand the
torque between the hub and the rim. Again, more weight. Rim brakes make no such requirement. Disc-brake
hubs must withstand torque between the flanges, since the braking is all on one side. I expect that if the UCI
lowered the minimum allowable weight, the industry would go back to rim brakes to get the bikes down to that limit.
Bill McReady, president of Santana Cycles, did tests on disc brakes years
ago when people were starting to ask for them on tandems. On his test descent, what he found with the disc brakes that were
on the market was that either the discs would warp from the heat and make the bike unridable, or plastic parts in the caliper
assembly would melt, or in the case of hydraulic brakes, the fluid would boil and leave you without brakes. Rim brakes were
ok if you had black-anodized deep-V aluminum rims to get rid of the heat, especially if you started with slightly lower than
normal pressure so the extra pressure from the heat didn't blow the tire. The only thing he was recommending for that
scenario was the Arai drum brake, to act as a drag brake for the descent, controlled by a bar-end shifter, and then still have
rim brakes for momentary braking before individual curves.
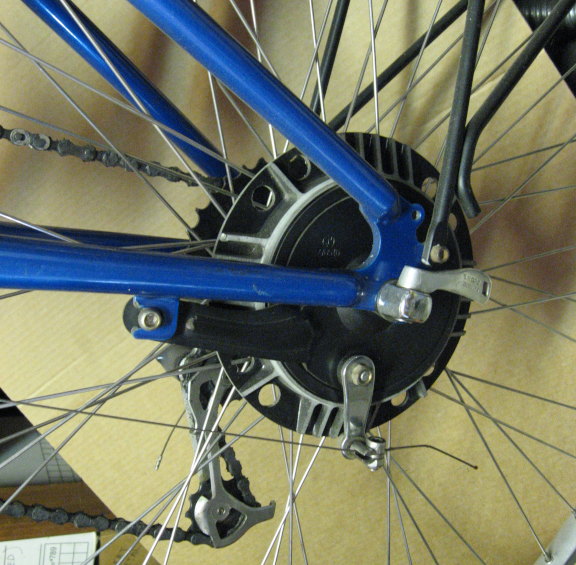
(People would give the argument that you could then cook the grease in the hub and damage it from heat; but no, the drum's
braking surface is far enough from the bearings, and has cooling fins, such that not much of the heat reaches the bearings.
Just use a suitable grease like trucks whose drums can visibly glow in the dark and not damage anything.) After that, he did
come out with a disc brake for tandems, but the discs were the size of a dinner plate.
- thru axles: The way disc brakes are behind the fork blade, applying the brake tends to eject the wheel with
the dropouts we had 10+ years ago. I've seen photos where someone I was in frequent contact with on a forum showed where the
tiny teeth of the obviously very tight skewer gouged the dropout as the disc brake ejected his wheel. Putting the disc-brake
caliper on the front of the fork blade would have corrected this problem; but what the industry chose to do instead was to
do the thru-axles, which partially defeats the purpose of quick-release skewers!
- Shimano's cranks breaking, Ultegra and Dura-Ace. (A web search for "broken Shimano cranks" will turn up
plenty.) I myself have snapped a Truvativ crankarm too. The industry is just trying to make things too light, and it's
cutting into our safety.
- sloping top tubes: When I was shopping for a new bike in 2004-2005, the sloping top tubes were new.
Giant seemed to be the most extreme. I use the tall 32-ounce water bottles, and I went to a practice race, and held my bottle
up to some of the seat-tube waterbottle cages on bikes with sloping top tubes, and realized that if I got one of those, my bottle
wouldn't fit, even with side entry.
- press-in bottom-bracket bearings: I was glad to read that they're going back to threaded ones because the
creaking of the press-in ones was driving people nuts!
- abandoning triple cranksets: There's this myth that triples don't shift as well as doubles. The triple
should instead be viewed as a double that shifts better than a double, because of the fewer-teeth difference between the big
ring and the next one down, plus a granny ring for the few times you need it but are glad it's there when you do. When I was
shopping for a bike in 2004-2005 and was considering the new stuff out, one of those was compact cranksets; but doing some math, I
realized that in the rolling hills I often ride, I'd have to constantly be shifting the front, whereas with a 30-42-52 crankset, I
could stay in the 42T ring almost full time and seldom shift the front. BTW, best front shifting comes from ignoring Shimano's
front-derailleur mounting instructions and instead making the rear tip of the cage be out slightly farther than the front, rather
than parallel to the chainring like Shimano says. (You might have to make a slight change in the cable routing to get the
right amount of travel if your front shifter is indexed.)
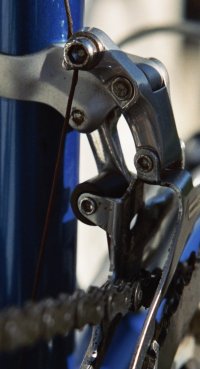
I had problems with our tandem's triple even right from the
factory, until someone suggested this on a forum. That was almost 25 years ago, and I've applied it to other bikes as well,
and never had any more trouble.
So how about going with a single chainring and eliminating the front derailleur altogether, and just putting a wider-range
cassette on? All the big cogs on these huge cassettes I'm sure will add more weight than another chainring would. I
tried going with a single chainring 20 years ago and found that the twisting jerk caused by rear shifting sometimes made the chain
come off the front; so I reasoned that if I was going to need a front derailleur to keep the chain on anyway, I might as well put
the second chainring back on. I suspect the problem has been corrected with these new chains that can only be put on one
way; but why keep looking for solutions to problems that don't have to exist?!
- seat posts that fit only one model of frame: Good grief! I know they wanted to reduce wind resistance,
but now you can't reverse it like I wrote about above, and you cannot transfer between frame models, and you cannot clamp another
waterbottle cage holder or anything else on there. Please, industry, just make them 27.2mm round!
- integrated bar & stem, hiding the cables: I know they want to slightly reduce wind resistance again, but now
you can't easily change the stem length or the bars' angle. And as for hiding the cables, there has to be a hole in the
steering tube to let them through to the frame, and that weakens things, and I've seen video where it resulted in breakage that
caused an accident.
- electronic shifting done wrong IMO: Even before there was any, I was advocating for using something like the
model aircraft servos which, because of their application, already have to be small and light for the amount of power they have,
and they have to maintain their position without power. If these had been used to pull a short cable, then any brand
of derailleur could be used, with any brand of cassette, and you'd tell the computer, in the setup, exactly what position to use
for each gear, including trimming the front derailleur.
- tubeless tires: When I first saw these at a bike show, I asked how you're supposed to fix a flat on the
road. The man said, "You just put a tube in it." I said, "Oh, great! Now I get to fix it twice—once out on
the road, and then again at home if I want it to be tubeless again." Now they use a sealant liquid which is supposed to
reduce that need; but it only lasts something like six months. I go at least that long without having to fix a flat with my
tubed tires anyway! You also need a special pump to blast the bead against the rim to establish the initial seal.
A couple of my friends have tried tubeless, and did not appreciate having their legs sprayed with sealant when they did get a
puncture. Further, a tubeless tire with sealant has just as much rolling resistance as a non-tubeless with a thin latex tube
in it. I've also seen video of a bead breaking away from the rim in a corner and the sealant sprayed out even without a puncture.
At the show, the value initially touted for tubeless is that you won't get pinch flats. Almost none of the flats I get are
pinch flats. The last time I got a pinch flat was many years ago; but if you don't keep enough pressure in the tires to avoid
pinch flats with tubes, you'll damage the rims when you bottom out, especially now I'm sure with the hookless rims made to reduce
wind resistance. When I did get a pinch flat, it was because I hit some railroad tracks so hard it seemed like it would break
the wheels. It did crack the rim; and a cracked rim won't hold air like a new tube will, and it will be a lot more expensive
to fix. Leave the tubeless for cars!
- lots of mutually incompatible freehub body types, instead of sticking with HG as a standard, whereas with
freewheels (which screwed onto the hub), they all had the same threading, at least in the US. (They did not all use the same
freewheel remover tool though. There were several different splined and pronged types. I have several types here.)
- ceramic bearings: Ceramic balls might be harder and rounder than steel ones, but they still have to ride in
races that are no more round than non-ceramic bearings do. Ceramic bearings do better than steel ones at very high speeds,
high temperatures, accidentally running dry, or where electrical isolation is needed, all strengths that are irrelevant on
bikes. I've seen demos where supposedly the ceramic ones had less resistance to turning, but these did not put a load on the
bearings, so all you're evaluating is the tightness of the seals. Even with steel bearings though, the amount of power wasted
by the bearings is so little that even cutting it in half will have no significant effect on your performance. Improving your
position on the bike will have far more effect.
- brifters' constant need for lubing: Many Shimano brifters, ie, integrated brake-lever/shifters,
seem to frequently fail to release the cable when the smaller lever behind the brake lever is pushed sideways, unless you keep
lubricating them. When the Bicycling forum was active, members would often say their brifter quit releasing the cable, and
other members would say that's what happens, and you just have to replace it. Unfortunately brifters often made up 20% of the
price of the bike, and of course it takes labor time to replace one. One of the bikes in our stable had 105 brifters, and I
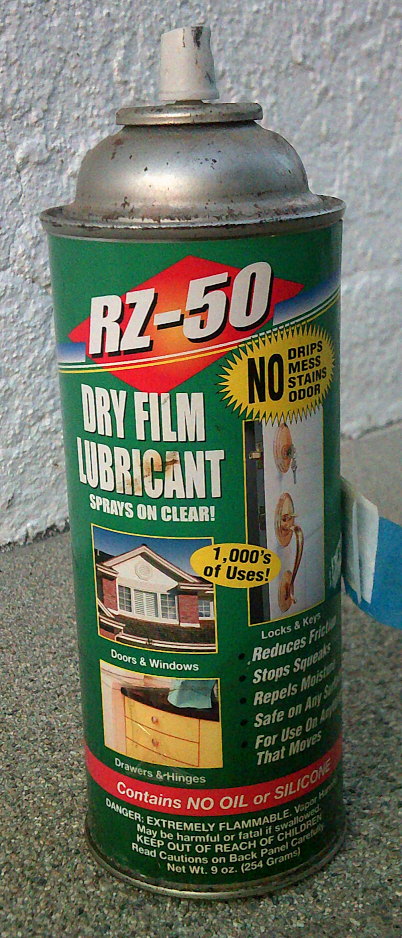
found that spraying its mechanism with a lubricant that left a dry lubricating film always fixed it quickly. (You don't want
something that leaves liquid oil or grease in there, because road dirt will stick to it and muck it up.) I put a rag under
the bottom of the rubber brake-lever hood to keep the excess from running down the handlebar tape, and held the brake lever in to
be able to put the straw of the spray can into the shift mechanism, and flood it, and work it up and down the cassette or crankset
several times. The original spray I think I used years ago was LPS 1. Our younger son recently emailed to ask what
to use to free up his brifters, and I told him I was out of LPS 1 but had this other stuff in the garage, but couldn't remember if
I had used it on brifters. He asked to try it. He reported later that it worked great.
I'm not particularly picking on brifters as a bad innovation. They are quite popular, and almost a must in racing; but I will
say that besides being super expensive, they are much more finicky than other shifter types like bar-end (which I use on my
aerobars) or downtube shifters, both of which are much more tolerant of cables and adjustments not being quite perfect. In
fact, the only downside of downtube shifters is the location. Outside of that, they are the most responsive and
crispest-shifting, because there's less cable length and hardly any cable housing! Don't confuse them with the friction
shifters of past decades. Indexed downtube shifters are still being made today.
I've done this a couple of times. There are situations that may call for it, but often it's not worth it, because one thing leads to
another, and you'll find you're not done until there's nothing left, like peeling an onion. It depends partly on how old we're talking
about though. I'll try to remember the sequence, what I've done. Some steps may not apply to some bikes.
- Let's say you want indexed shifting, with more cogs in back than what the current hub will handle. That probably means you're
in for a new wheel, especially if the existing one is made for screw-on freewheels, not cassettes.
- Was the old wheel 27"? If so, and the new one is 700c, will the brakes reach? You'll probably want new dual-pivot ones
anyway. I've put Tektro R359 dual-pivot ones, with nuts rather than
recessed bolts, on a couple of bikes. Excellent upgrade. (Most other brands of this type of brake won't work on older
frames that weren't made for recessed bolts.)
- Make sure the freehub body on the wheel you're looking at buying will handle the number of cogs and brand of cassette you want.
- Note: Up through the 1970's and probably partly into the 80's, standard rear dropout spacing was 120mm, for 5-speed freewheels.
I think there were 6-speed ones that fit in that spacing too. When I worked in the shop in the 70's, we had heard of 6-speed,
but had not seen any yet. Next came 126mm, for 6- and 7-speed freewheels, and there might have been 8-speed ones too, but by
that time the industry was going to freehubs because as freewheels got more and more cogs, the hub's right-side bearings got farther
and farther from the dropout, increasing the leverage to break the axle. The freehub body itself contains the right-side
bearings for the hub, much closer to the dropout. Anyway, then came 130mm which I believe is still standard today. This
means that if you have an older frame with narrower spacing, you'll have to stretch (bend) it out, and you'll have to be careful not
to bend the right side more than the left, something which is unfortunately easy to do because of the indentation on the right
chain stay which is there to give the chainrings a little more clearance.
- Now the shifters. I initially tried a 9-speed cassette with friction shifters, but I had to give that up. Even when I'd
look down to try to make sure I had the chain centered on the cog, when I'd get out of the saddle and torque on things I'd get a
skip, with a loud bang. I had to resign myself to getting 9-speed indexed shifters, even though they were
down-tube. If you want brifters (ie, integrated brake-lever/shifters), be aware that even on new bikes, these
make up a surprising percentage (like 20%) of the price of the bike, and they're a lot more finicky than other types. (I
won't address electronic shifting here.)
- Cable-pull differences: A relative gave us a professional-grade ten-year-old racing bike from the late 1980's. It was my
wife's size, and had marvelous handling, but the gearing was too high for her, a non-climber. I set out to put lower gears on
it. Componentry was Campagnolo Record, including indexed down-tube shifters, with Regina freewheel. I put a Shimano 13-34
Megarange freewheel on it. ("Megarange" means it jumps from 24 to 34, giving closer spacing in the higher gears but then the 34
serves as a bail-out gear. The Campy derailleur couldn't handle the 34, so I put a Shimano Deore LX (not the RapidRise type) on
it. The cog spacing and this derailleur's cable pull ratio were different, so now I had to replace the shifters with 7-speed
Shimano Dura-Ace ones. (At least the hub's threading was English, so I didn't have to replace the wheel too!)
- If you're going for more speeds, you'll need a narrower chain too. That's not too big a deal considering you'll probably wear
out a lot of chains eventually anyway, if you ride the bike a lot.
- Chainrings: However, on this bike, I wanted to replace the 42T inner chainring with the smallest I could get for the Campy
crankset which had a 135mm bolt circle diameter (BCD). Shimano's are mostly 130, not 135. The smallest you can get for
135 is 39T. Keep reading though...
- If you're going from, say, 5-speed freewheel to a 9 (or more)-speed cassette, the chain will get thinner. Now you have to
see if the chainrings' teeth are too thick for the newer, thinner chain to go over them. Will you need new chainrings?
Also consider whether the thinner chain will fall down and get stuck between the chainrings. Will you need a new crankset?
- If you need a new crankset, you might need a different bottom bracket, ie, the spindle and bearings. I know from experience
that even if both the old and the new cranksets take a square-taper BB, there's more than one taper. (I got the wrong one on
a bike, and it always teetered a bit, causing chain rub on the front derailleur.) If you need to get a new BB type, make sure
the frame's bottom-bracket shell is English-threaded. If it's not, a shop may be able to re-tap it for you. I don't
remember if Italian, French, and Swiss threading are all slightly smaller so you can indeed re-tap them. Maybe later I'll
research that and put that information here.
So after having gone through this a couple of times, I have more or less concluded that it might be best to just make it work the best it
can for its vintage, even with NOS (new-old stock) parts, and if you want something newer, buy something newer.
A way we used to get a good spread of closely-spaced gears was called "half-step," and often "half-step plus
granny." We only had five cogs on a freewheel. For crit racing, you didn't need a wide range of gears; so you could
get away with a "corncob" freewheel (like my picture further up) of 14-15-16-17-18 teeth (as 14 was always the smallest, and you probably
didn't need anything bigger than 18 in a crit race). For anything else, getting a relatively wide range of gears without big holes
between them required half-stepping, which means the holes left between cog sizes were made up in another chainring. It made for
more front shifting; but it fit the bill.
I worked out dozens of combinations mathematically, and plotted them on a logarithmic scale, and the best I found was a 28-42-47
crankset, with a 13-16-20-25-32 freewheel. If you deviate even by one tooth somewhere, you'll foul up the whole thing. Here
are the gear ratios:
| cog |
granny ring |
middle ring |
big ring |
| 32T |
1st 23.63" |
(6th 35.44") |
(11th 39.66") |
| 25T |
2nd 30.24" |
7th 45.36" |
12th 50.76" |
| 20T |
3rd 37.80" |
8th 56.70" |
13th 63.45" |
| 16T |
(4th 47.25") |
9th 70.88" |
14th 79.31" |
| 13T |
(5th 58.15") |
10th 87.23" |
15th 97.62" |
The ones in parentheses go unused because of the not-so-good chain line (especially because chains back then were not as flexible sideways)
and/or because they're near-duplicates of other gears with better chain lines.
Arranging the good ones in order of how high the ratio is, we get (and I'll do this one as an image since I don't know how to make a
table like this in html):
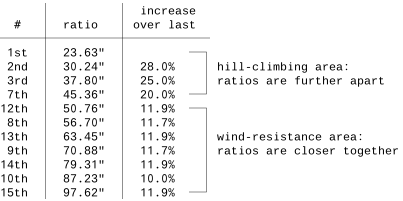
As you can see, the jumps are mostly just under 12% through the entire range except the climbing gears.
Charted on a logarithmic scale, we get:

(15th was off the screen when I took the screenshot; but 15th is above 10th by the same amount 14th is above 9th.)
If the gears seem lower than you'd want, well, yes, they are more geared toward touring than racing; but consider three things:
- You generally wouldn't use half-stepping (and especially the granny) for racing.
- There was more of an emphasis on spinning at high RPMs when we had only 5 cogs on a freewheel, and 14T was the smallest common
cog, and then we got 13T in the late 1970's. (12T and 11T are common today, but I don't have 11 and I don't use my 12
below 36mph. I've spun my 52/12 up to 54mph and was not spun out, but that was as fast as I dared for the traffic
situation.)
- Try as you may, different numbers of teeth, but I don't think you'll find any better spread and distribution of gears.
Fortunately you could order custom freewheels and cranksets with virtually any reasonable combinations of teeth. Today's cassettes
don't let you do that, partly because the cogs are specifically mated and ramped to help the chain up onto the next-larger cog only
in places where the chain will mesh correctly with the teeth rather than having the rollers riding on the points. Same with
chainrings. (They also don't want to stock so many chainring sizes.) An advantage we got from that is that besides quicker
shifting that's ready to apply power sooner, it helps keep the chain from going off the outsides of the cassette or crankset where it
could even get stuck. Spécialités TA cranksets still offer pretty much any reasonable combination of numbers of teeth
though, and TA has some absolutely gorgeous cranksets—real eye candy! The distributor that comes to mind is
Peter White Cycles.
It's hard to categorize these many things; but I'll start with gearing,
since we were just discussing that, above.
- gearing: Above, I addressed the myth that triples can't shift as well, but I'll reiterate that with a
30-42-52 (as opposed to 30-39-52), I can do most of my riding in the middle ring, from climbing, to high 20's of mph, and
rarely need to shift the front. Unfortunately manufacturers partially dropped the 42 because they were already using 39 for
doubles (like 39-53) meaning they wouldn't have to stock as many sizes if they put a 39 on the triples; so I've bought myself a
lifetime supply of 42's. Also, a 34-50 or 36-50 compact double would require shifting the front more often, and the larger
jump means it won't shift as well.
Myth: 10-speed gives closer spacing than 9-speed. The truth is that in a normal 12-25 or 12-26 cassette, all the
jumps are exactly the same except that 10-sp adds the 16T cog between the 15 and the 17. See:
12-13-14-15- -17- -19- -21- -23- -25, compared to
12-13-14-15-16-17- -19- -21- -23- -25
but people were paying a lot to "upgrade." Unless you're racing, it might be hard to feel a difference smaller than the
jump from 15 to 17.
Then came 11-speed, which added the 18T. Again, it might be useful in racing where you need the optimum gear to respond
to others' accelerations and so on, but I don't think it'd have any impact on your performance when you're riding by yourself, as
I usually do. Then came 12-speed. I and my family are stopping at 9, because it's a good compromise between cost,
durability, and master links' reusability (important for my
chain-lube method that gives super long life and keeps things clean).
- Way down the line but related to gearing: Those who did not grow up with down-tube shifters don't realize
that when slowing way down or coming to a stop, we used to quickly work both shifters at once with the right hand while
operating the all-important front brake with the left at the same time. The handlebar shape used to make it more
conducive to ride in the drops, and arm extension was about the same from there to the shift levers; so it wasn't really a
reach. Before there was indexing, freewheel cogs were fewer and farther apart, so experienced riders could very quickly
shift accurately. At a large, 5-point intersection near home, if I punched it hard when my light turned green, I could reach
nearly 30mph in the space of the intersection, shifting up three or four times in the process, with down-tube shifters.
- tire rolling resistance: It's counter-intuitive, but narrower tires actually have more rolling
resistance, according to lab tests. As any given part of the tire enters the edge of the contact patch, it has to bend more
sharply, and then "unbend" as it leaves the contact patch, and this constant flexing consumes energy. More pressure reduces
this flexing; but then rough roads waste more energy shaking the rider's inelastic body. (The rougher ride also makes him get
fatigued sooner.) Unfortunately rough roads require more pressure to avoid pinch flats or at least avoid damaging rim from
the tire bottoming out. Until recently, pros used the narrowest tires, because at their speeds, wind resistance is the bigger
enemy. Apparently they figured out recently that they had gone overboard, and that a little wider is better.
- Non-cyclists of course have the most misconceptions. A neighbor thought we used the tight cycling shorts
just "to be in the 'in' crowd," and said "They look so ridiculous in them." I explained that wind resistance is the major
enemy at our speeds, and wrinkles add to that; and also when you have potentially tens of thousands of pedaling cycles in a ride,
sitting on a wrinkle can produce a nasty saddle burn. Related, the pad of course prevents burn from the seams in the shorts.
- They also think we only do the climbs for the reward of the fast downhill after that. I tell them that when
you're in good shape, climbing is fun and a good climb is its own reward.
- They think it's dangerous to have your feet connected to the pedals. I explain that they're made so turning
your heel out, which is a motion you don't do in normal riding, gets you out instantly, and they also let go in an accident, and
that sometimes safety depends on having better acceleration which you can only get with your feet attached.
There was a time when only a mile after leaving home, I stopped at a light, and needed to fix my sock that had an uncomfortable
wrinkle inside my shoe. I unclipped on the right and put my right foot on the curb, and left the left shoe in the pedal and
just took my foot out to fix my sock, leaving the shoe dangling on the pedal. A woman in the passenger side of a car next to
me looked like she'd seen a ghost, apparently terribly frightened that we would have our shoes attached to the pedals, LOL.
- They think trackstanding is just for show. I explain that although unclipping from a pedal is
instant, clipping back in is not, and the intersections are the most dangerous part of any ride, and that's not the place to
be looking down and fumbling with a pedal to get going when the light turns green, and it's good to have good acceleration power
available then. I like to be in a lowish gear to start the acceleration, and clipped in. I can usually trackstand; but
if the road isn't sloped right for it, sometimes there's a tree or pole close enough to the curb to lean on with one hand so I can
stay clipped in.
(Non-cyclists don't realize that the real dangers we face are not the ones they think. They're two different sets.)
- Many think bikes don't belong on the road, because they don't pay gas taxes or a vehicle license fee. I tell
them that where we are (and probably throughout most of the US), local streets and roads are paid for by property taxes and sales
taxes, not the fees they thought. Also: It was the League of American Bicyclists (called "Wheelmen" back then) that
originally pushed for paved roads over a century ago; so why is it that now that the lazy drivers have something they like, namely
paved roads, they want those who got them for them off the road?!
- One woman told me it was terrible that these cyclists just ride through intersections as if they were driving, instead of
getting off their bike and walking it across the intersection—and they even use the left-turn lane!
(<Gasp!>). I told her, "Yeah, that's the way the law says to do it," and I explained why it's safer that way, that when
you're walking the bike, you can't stop it as quickly, you can't accelerate it as quickly if you see the need, you're more likely
to trip over it if you try, and our cleats also are impractical to walk in anyway. The bike laws in the California Vehicle
Code start in section 21200; and sections 21202 and 21208 have the six exceptions to the rule about staying clear to the right:
- to avoid using the right-turn lane if you're not going to turn right
- to use the left-turn lane if you're going to turn left
- to move farther left to avoid debris and obstacles (and there's often plenty of tire-eating debris near the curb!)
- to pass slower-moving vehicles
- you can take the lane if it's too narrow for cars to safely pass you in the same lane (although I strongly recommend using
a mirror if you do that!)
- and you can ride on the left edge of a one-way street.
- I think my dad still thinks that a low position on the bike means "all hunched over." A good fit does not
hunch the back though. And when I'm on my aerobars, my back is nearly straight, in spite of being only 20° from
horizontal. There's a picture further down the page.
- A myth even among cyclists however is that a low position and aerobars require more flexibility. Not true;
and I've never been very flexible. The key is
to put the saddle farther forward (unless you have to race by UCI rules). It was nice in the early 2000's to see some big
people in the industry—Keith Bontrager was one I remember—finally come out and say that the KOPS (positioning the
saddle so the Kneecap is Over the Pedal Spindle when the crankarm is sticking straight forward)
was always wrong. It's ok as a bike-fit starting point; but insisting that it has to stay there neglects some important
factors. I never could get comfortable until reversible seat posts came out (shown in a picture above). It's not
about the distance to the bars, but rather that I always wanted the cranks farther back, relative to the seat.
- "Geometry" is not just about the position of the rider. Two different bikes could put the rider in exactly
the same position, yet one handles great and the other handles terribly, because of head-tube angle, fork rake, stem length, and
more. Small people are often put on 700c wheels just for more tire choices and availability; but they cannot get good handling
on 700c. When our son was racing in Juniors, we saw so many kids put on 700c's, and it was like they were sitting down
between the wheels instead of over the bike, and they'd weave and they obviously didn't have good command of the
bike. A friend, a very small woman, was riding a tiny carbon-fiber Calfee with 650c wheels, and needed a new rear wheel, and
couldn't find any, so she thought she had to have a custom frame builder make her a frame with 700c's. She traveled hundreds
of miles for this, got measured, and got a frame made. Her position on it is good and comfortable, but she says the handling
is terrible. Use 650c for short people, even 24" for kids. This is our then-11YO son on a tiny triathlon bike
with 650c wheels:
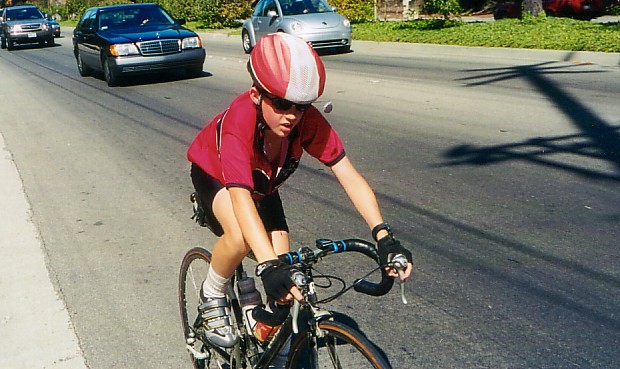
(I know the jersey is too big. It was the smallest one we could find!)
- Small people need shorter crankarms too; and I don't mean just 10mm shorter, like 165's, but probably the shortest
available.
TA Carmina,
Carmina Compact, and
TA Vega come as short as 155mm. For really short
people, I wish there were even shorter options. People think shorter means less power. Lab tests show this is not true
though. (See
this article,
and
this one
at about the middle of the page.) Longer gives a little more leverage, but at the expense of cadence, so all that happens is
it moves your shift points slightly. Note that with shorter crankarms, you can achieve a lower, more-aerodynamic position
since your thighs won't be hitting your chest (or stomach, if you have a big one).
- Pedal-cleat float is related. The common thought is that you need pedal float to avoid knee injury. My
observation and experience however is that what's hurting riders' knees is not a lack of float, but rather that they don't set the
cleats at a good angle, and without float, the feet and knees are forced into a bad angle. I myself need the cleats to force
my heels to stay way in, nearly hitting parts of the bike, meaning the opposite of pigeon-toed, to avoid re-injuring my knees.
That means no float!
- I cannot support the idea that we don't really pull up on the pedals. I pulled my first pair of
clipless-pedal shoes right off the soles, and tried to glue them and hold them together with toe straps until I could get new
shoes. I had to go easy on them. These were early ones where apparently the manufacturer, Shimano, didn't realize we
really do pull hard, particularly in sprints. I also cannot use real Look pedals, as their max release tension is much too
low. I use Wellgo clones that have double the max release tension (and I keep it set at max). When my knees were bad
(about 2005-2015), I trained myself to do more pulling, because pushing hurt. (They've mostly healed since then, with the
heels-in position and better nutrition.)
- feet swelling: The last time I was in a store trying on shoes, the salesman was helping a newbie shop for
his first pair of clipless-pedal shoes, and I could hardly stand to hear him saying several things that just aren't true. One
was that feet always swell after you're warmed up, so you need to buy ones a little wider than what's comfy in the store. I
have no doubt that some people's do swell; but when I put my shoes on, I always make the straps as tight as I can, and I never have
to loosen them later. I didn't want to keep contradicting the salesman, but I did suggest, "It might depend on the
individual. Mine definitely don't."
- A saddle that works well for one person might be terrible for someone else. If one has the right shape for
your particular "undercarriage," it is neither helpful nor desirable to have much padding (or even have much padding in the shorts
either). You just have to try several saddles and find what works best for you. I have not found any correlation
between price and comfort; so the quest isn't necessarily expensive. Many shops apparently know the problem, and have a
collection of saddles you can try, and they let keep trading them in until you find something that works for you. I've bought
a lot on eBay, used. Some have been fine, others not.
- saddle sores: A common thought is that cleanliness is paramount, and some people have asserted that you have
to shower both before and after a ride, washing thoroughly, and certainly wash the shorts after every ride. What I've found
from experience is different though. Rivendell Bicycle Works used to
publish "The Rivendell Reader," with lots of articles of the kind you wouldn't find in VeloNews, Road Bike Action, or Bicycling.
Grant Peterson is Rivendell's owner. Wow—I thought I was a retrogrouch, until I met him! (I'm not
against progress, but I don't believe "new" automatically means "better.") Anyway, he recommended saturating the shorts'
pad with Vaseline (petroleum jelly), not just for lubricating, but because the bacteria cannot multiply and thrive in the Vaseline
environment. So I melt some on the stove and carefully saturate the pad without getting it in the non-padded part of the
shorts. I apply additional Vaseline (or A&D Ointment) to my own underside before putting the shorts on. That was the
end of the saddle sores. It takes two or three rides to totally get it worked in; so I would not want to do a century in
shorts that didn't have at least one previous ride on them. Between rides, I press them between layers of absorbent newspaper,
with books on top for weight, to absorb sweat and excess grease. I go many, many rides without washing them. Washing
takes a load of detergent to break down all that Vaseline.
A friend recommended Bag Balm ointment, but for me, it caused a painful chemical burn!
BTW, I like shorts with a thin, non-sculpted pad. I've been sitting crooked on the saddle all my life, such that things
aren't symmetrical down south anymore, and things don't line up right with saddles with cutouts or shorts with sculpted pads.
I also want a waist band to keep my cotton undershirt in, which makes me much more comfortable and I can handle a wider temperature
range. If you ever made candles as a kid, and experimented with different materials for the wick, you know that cotton wicks
up the paraffin wax better than the synthetics do. I do not want bib-type shorts. This all means I do great with the
$16 shorts rather than the $160 ones!
- cramps, to continue with the physiological: Besides simple lack of fitness, cramps seem to come mainly from
dehydration, and from sweating out your minerals and not replacing them, especially sodium and potassium. A website that has
unfortunately gone belly-up had an article years ago on how much of various minerals were lost in sweat; and from that, I
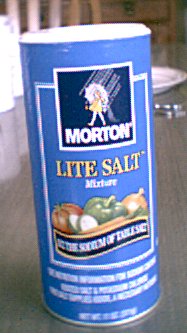
calculated that I should put at least half a teaspoon of sea salt and at least an eighth of a teaspoon of Morton's Lite salt (which
is half potassium chloride) in each quart of water I take on the ride. Shown here is the Morton's Lite salt container:
Actually, I go nearly double, and it spelled the end of my cramps. Note also that tachycardia (ie, a runaway heart rate that
you can't get under control) is often (usually?) caused by
lack of potassium; and PVCs (ie, skipped beats), by lack of magnesium. Your muscles need calcium to contract, and magnesium to
relax; but apparently you don't lose much magnesium in your sweat, so if you get enough in your diet and normal supplementation
(which most people don't), you probably don't need any extra in your drink.
If you're afraid of raising blood pressure, don't
be. Let me recommend the book "The Salt Fix," subtitled, "Why the Experts Got it All Wrong and How Eating More Might
Save Your Life," by cardiovascular research scientist Dr. James DiNicolantonio, ISBN 978-0-349-41738-7. The only study
that ever found that salt raised blood pressure was done on rats (or mice—I don't remember which) that were specifically
bred to be extra salt-sensitive. However, a salt deficiency can lower blood pressure in two ways. One is that
without enough salt, you cannot hold onto your hydration; and when you get dehydrated, your BP drops. The other is that a
salt deficiency weakens your heart. Neither of these is a good way to reduce BP, now is it?!
You can get a good idea of how you're doing on water by weighing yourself before and after a ride. Each two pounds lost
means you're short a quart. In my early cycling days, I'd drink a lot before a ride, but then didn't drink nearly enough
on the ride. Bikes typically had waterbottle-cage mounting bosses only on one tube, the down tube, and water bottles
were also typically only 16oz, or maybe 20, not today's bigger ones. Nor did I take in any calories on the ride. That
was ok for shorter rides, and before my first century attempt, I had been doing rides up to 50 miles before breakfast, and
finishing strong. What would become important later is that I didn't realize how close I was coming to running out of gas!
Then I tried my first century. I got in with the fast group—I don't know how they tolerated me, as
I had zero skills for riding safely in a group—and we did the first 55 miles in 2:15. Then I dropped off.
There had been two rest stops, and these men were loading up on food and re-filling their water bottles. I thought,
"Pansies!" A mile after the second stop, I started feeling like something wasn't quite right. A mile after that, and I
"ran out of gas." That's how sudden it was. Just suddenly I could hardly move, and I started cramping badly too.
I struggled through the next 25 miles, and had to take the sag wagon the last 20 miles. I've done many, many centuries since
then, but learned to eat and drink. Actually, on my last one, I hadn't done one in a while, and you tend to forget how
important it is to keep eating. I averaged 23mph for the first half, and then began slowing down. By the time you
realize you haven't been eating enough, it's hard to catch up! Same with drinking.
I've sweated as much as three gallons on a warm afternoon century. How do I know it was that much? Because I
drank 2½ gallons, ate, never went to the bathroom, and still lost the weight of another half gallon (four pounds) I should
have drunk!
I've studied health (not medicine) thousands of hours. As I write this, I'm eight years past the average life expectancy
of an allopath, ie, a standard medical doctor, yet I have none of the problems a man of my age is supposed to have, I've never been
on any medications, and I can climb the local canyons on my bike as fast as I did 45 years ago. You can totally avoid heart
disease (and other things) without drugs or medical intervention; but let me address, next, the matter of...<keep
reading>...
- heart-rate myth: First, I don't want to push you beyond what's safe for you; so if you're not sure of your
heart health, well, I'll leave it to your own caution. The common myth is that your max, in beats per minute (BPM), is 220
minus your age. My own is at least 15 BPM above that. You can only find out what it is by trying it, which is not much
fun. Get a good warm-up, then pick a hill that you can climb for six to eight minutes at a constant power output that will
keep your heart rate slowly increasing the whole time. Just when you think you absolutely cannot continue and feel like you
have to let up, instead, get out of the saddle and sprint absolutely as hard as you can, reserving nothing. In ten seconds or
so your legs will feel like they turn to Jell-O and you'll feel like your heart is going to jump out of your chest and like you'll
choke from oxygen starvation, and like you're about to faint. That's the time to look at your heart-rate monitor.
- percentage of max heart rate: You should be using the Karvonen method, where 0% is your resting rate, not
a stopped heart. So, for easy, round numbers, suppose your resting rate is 50, and your max is 200. 50% is halfway in
between, which is 125, not 100. To find the percentage of max that a certain heart rate is, use:
percent = 100 * (HR - min) / (max - min)
So for example, what percentage is 160 BPM? It's not 80% (ie, 160/200), but rather:
percent = 100 * (160 - 50) / (200 - 50)
= 100 * 110 / 150
= 73.3
Going the other way, to see what heart rate a certain percentage is, use:
HR = (max - min) * percent/100 + min
I believe it was in Joe Friel's book, "The Cyclist's Training Bible," he advised avoiding the 80-85% area, because it's hard
enough to require recovery but not hard enough to make you faster. In the case above, 80% would be:
HR = (200 - 50) * 0.80 + 50
= 150 * 0.80 + 50
= 120 + 50
= 170 BPM
and 85% would be:
HR = (200 - 50) * 0.85 + 50
= 150 * 0.85 + 50
= 127.5 + 50
= 177.5 BPM
so you would try to mostly avoid the 170 to 177 area, except to pass through it on the way to the other side. (If you're
in a race though, as opposed to training solo, you do whatever you have to.)
- Stretching, whether static or dynamic, whether before or after exercise, is surprisingly useless for reducing the
risk of injury, recovering from muscle soreness, and helping flexibility to ride in an aggressive aero position (I've already
discussed how it does not require flexibility anyway), and it actually reduces your performance, according to studies coach
Dylan refers to in this video as well as several articles
I've seen. The theories that had been pushed for decades were blown up when studies were finally done to find out the truth.
- "I tried spinning, and it doesn't work for me." No; you can't just try it for a couple of rides and conclude
it doesn't work for you. Achieving a high natural cadence takes training, over a period of at least months, if not years.
I trained for it in my early years, and it has done me a ton of good, for sprint power, knee health, clearing out the waste
products, and more. This was back when the smallest freewheel cog was usually 14 teeth, and there was more emphasis on high
cadence in race training. I had a teenage friend who was on a team and the coach would put his bike in a mid-range gear and
yell, "Now leave it there! And keep up!"
IMO, 90 RPM is not spinning. I like 105 for much of my riding. 90 makes me feel very lugged down. I used to do
close to 120; but riding the tandem with my wife put an end to that. (I realize, and accept, that heavier riders won't get up
there.) Lance Armstrong said 110 was ideal. I can be somewhat comfortable up to about 130 for a short time, like 10-15
minutes, and can do over 200 for a few seconds. When our sons still fit on the back of the tandem, they would ask me not to
shift up yet when the cadence was only 120, maybe even 130. (The upshift will of course result in a lower cadence.)
Don't think about pushing the pedals down the front, one after the other, but intead think about pedaling the full circle.
It will keep you from bouncing. Greg LeMond used to say to think about pulling back through the bottom of the turn as if
scraping mud off your shoe. You can also picture your knees connected together and you just move your lower legs forward and
back, like scissors. Kicking your cadence into the rafters for short periods while trying to keep your pelvis motionless is
another training technique. As you practice these things, you will gradually find your natural cadence increasing.
- Helmet myths abound. I will mostly just direct the reader's attention to
cyclehelmets.org and to the article
"When Should I Replace My Helmet?" I had another one bookmarked
which unfortunately has gone belly-up. The nutshell version is this:
- Bike helmets' protection is exaggerated. Bike helmets don't give the protection of a motorcycle helmet.
- People break a helmet and then say, "That helmet saved my life!" Probably not true. If it broke, all it means
is that it failed, especially if you don't see any compression of the foam.
- Sweat will not degrade a helmet. It is illegal to make one out of material that degrades with sweat.
- Outgassing is not a problem either. The Bicycle Helmet Safety Institute put a helmet in the back window of a car to
cook for a couple of years, then tested it, and found that its protective qualities were not degraded.
- People say, "If you have a $10 head, go ahead and get a $10 helmet;" but the fact is that they all have to meet the same
standards, and the more expensive ones, with more vents and less weight, might shave it closer to the minimum allowable
protection.
I do recommend a helmet of course, and I myself need a hat anyway and it might as well be a helmet. Do keep things in
perspective though!
- Mirrors can give you a surprising degree of control of the traffic behind. The greatest danger in city traffic
is the intersections, and one of the dangers is that drivers, perhaps on the phone, are not thinking about what they're doing when
they plan to pass you and then immediately turn right. With a mirror, you learn to predict it and use a combination of hand
motions (not insulting!) and your positioning in the lane to get their attention and prevent the accident. I give them
room to pass on the right, then wave them by to make their right turn. They don't understand how I can see them, but they
appreciate that I'm looking out for everyone's safety. Also, sometimes the best course of action to handle a situation
developing up ahead will depend also on what's behind.
One man on a forum showed off his radar which told when a car was coming; but here in southern California there could be cars
as far as the eye can see, and if every fifth one is farther to the right than is safe for you, your radar won't help you one bit!
I could describe many other scenarios; but a serious one I'll mention is that on a curvy mountain road I was climbing, there
were lots of people going up to a lake for a vacation, some with boats on wide trailers, and they'd forget that just because the
tow vehicle would clear you didn't mean the trailer's right wheel and fender wouldn't kill you; and also people who had rented RVs
and didn't realize how much width they take up on the right, especially in tight turns! I'd be dead without a mirror.
I strongly recommend a glasses mirror, for several reasons. It gives a wider view than a handlebar mirror, especially as
you can turn your head to pan, and your own arm and body don't block the necessary view; it doesn't have the vibration problem of
a handlebar mirror, and you don't have to look down to see it. It doesn't shift around as much as your helmet (which would be
my second choice for where to mount a mirror). The way I mount them, there's no way an accident could drive it into my eye;
but of course the whole reason it's there is to prevent the accident anyway!
You can see the mirror on the glasses of our then-11YO son in the picture further up.
- Tail lights are often not aimed right. I see so many riders who have just clipped one onto their jersey
pocket or back pack or seat bag, and it's pointing up into the sky, rather than mounted solidly to something that will keep the
brightest central part of the beam pointed at the eyes of the drivers behind. For maximum effectiveness, take a few minutes
to mount it solidly on part of the frame, and aim it.
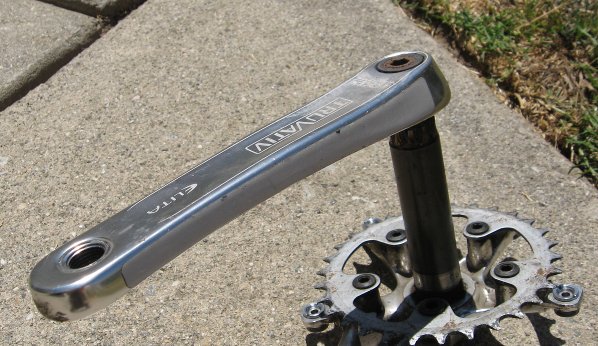
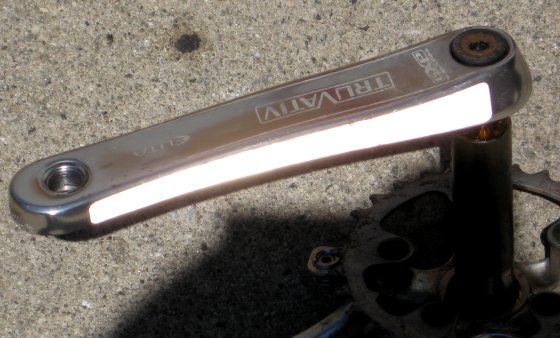
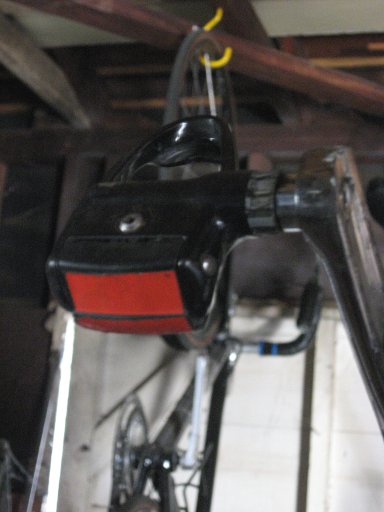
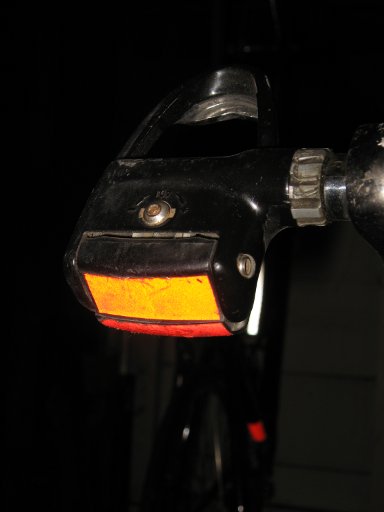
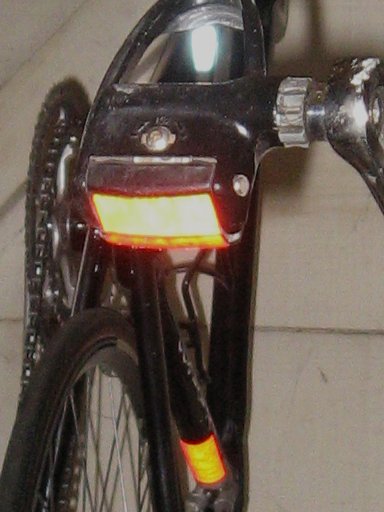
- Reflective tape is great for night visibility without adding weight or wind resistance. I put a wide, red
strip on the back of the frame and pedals, and white everywhere else, including head tube, crank arms, and rims. Here the
tape on the crank arm pretty much hides in the daytime, but is super visible when drivers' headlights hit it:
...and on a pedal:
- tire safety: The perceived tire dangers are often not the real ones. A friend who was new to cycling
had a mild case of this, where the fabric that protects the bead from tire levers was unraveling at the outside edge:

He asked the bike shop about it, and they said, "I hate to tell you this, but your tire is toast." It probably didn't even
have 100 miles on it. I told him, "They have to say that; because even though there's absolutely no risk, you could
later have something else unrelated happen to it, then get in a bad accident, and sue them saying, 'They told me it was fine, but
look what happened!'" Again though, this one is nothing to worry about.
What about punctures and cuts? Some people seem to think any kind of puncture, even from a wire from a car's steel-belted
radial, is a reason to replace the tire ASAP. That's an unreasonable extreme; but how much is reasonable? Our tandem
came with a kind of tires which, I did not initially know, should never have been on a tandem. When it was still quite new,
my wife and I got a blowout on the front. (We were only going 15mph, and narrowly avoided crashing.) It was a 3/4" rip
right down the middle of the tread. I had just read in Bicycling magazine that you boot a tire with paper money since in the
US, it's half linen and half cotton and very strong; so I put a few folded-up dollar bills in it, a new tube, and we finished the
ride.
tire booting: I looked up more about this, and made boots of different sizes cut from Mr. Tuffy tire
liners, plus a couple of big ones cut from worn-out tires (with the beads cut off), to keep in our seat bags:
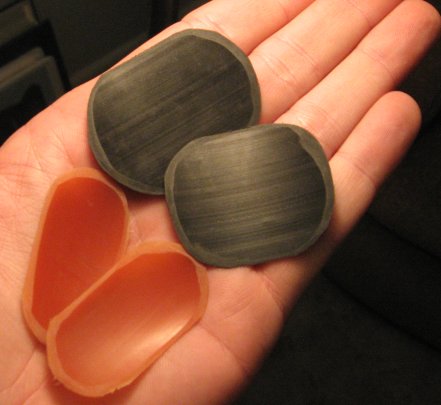
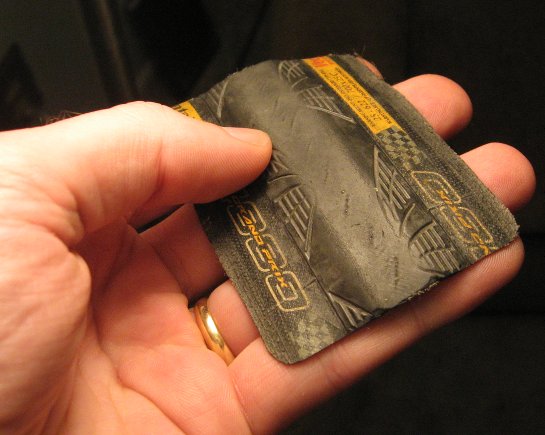
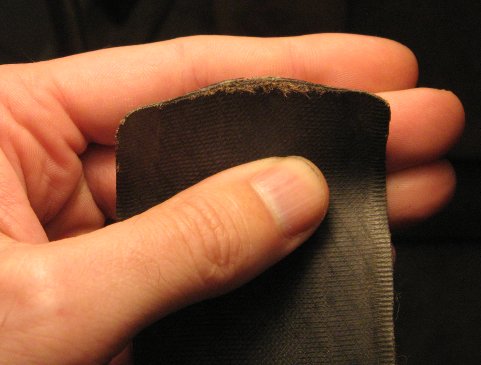
(I try to feather the edges with a file so they don't wear a slot in the tube and cause their own flat.) The idea of course
is to put this between the tire and the tube, over the cut. You don't need to glue it, as pressure will hold it in place.
(Patches are not suitable boots though, because they're stretchy.) The big pieces cut from a worn-out tire would only be for
huge blow-out failures, just to avoid being stranded. Obviously you wouldn't keep riding that for subsequent rides like you
can the other ones.
You can however boot smaller cuts, yes, even in the sidewall, like 1/4" long, and go on to finish wearing out the tire:
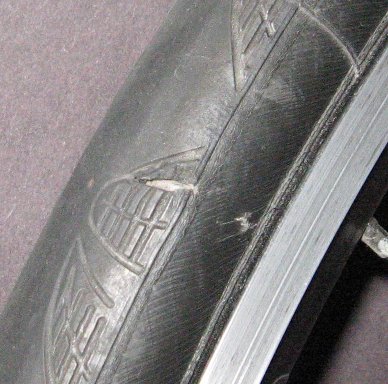
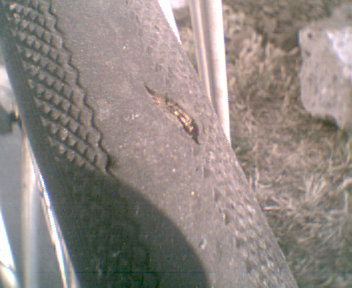
I've booted a lot of others that I never took pictures of.
Think these are dangerous? I and my family have ridden booted tires, some tires having multiple boots, probably 100,000
miles, and they've never been a problem. All of the catastrophic or near-catastrophic tire failures we've had were on
tires that were new or nearly new, meaning it was a manufacturing defect. None of them were on old,
booted tires. None! And I've bought and maintained at least 200 tires over the decades for myself and my
family. I've found that if a tire has a manufacturing defect, it will usually show up in the first 250 miles; so I don't put
maximum confidence in brand-new tires.
- Tire wear can be dramatically extended by using
Shoe Goo as a re-tread. Shoe Goo is an extremely
tough rubber glue that comes in a tube. The biggest tube, AFAIK, is 3.7oz. I wear a tire out until the strings are
exposed. Don't worry, there are lots of layers under there that are still perfectly sound, and the strength is there in the
carcass, not the rubber; so no, it's not dangerous. I joke that I ride them until you can see the air in the tire.
Before I started using the Shoe Goo, I would consider a tire like this one in the picture to be good for a few hundred more miles;
and in 200,000 miles' experience, it has never caused a problem:

Then I rub the tread hard with a rag, just holding the rag at the brake bridge and rotating the tire both directions to get all
the dirt off, then spread a film of Shoe Goo on the worn-out tread area, rubbing it into the pores and strings the best I can with
my finger in the short time it gives you to work it, in sections of 6" at a time, and do it on a night when I'm not going to ride
the next day, so it has plenty of time to cure before my next ride. When it gets worn down again, you can repeat the process,
over and over, as long as the carcass is still healthy.
I just replaced a rear tire I had 10,000 miles on, because of other damage I wasn't going to boot. I have not done this
"re-treading" for front tires yet, but I think I've gained enough confidence to start doing it now. Between that and my
paraffin-and-graphite chain-lube method (next), my per-mile cost of riding is very, very low.
- chain life dramatic extension: I have a separate page describing my
paraffin-and-graphite chain-lube method that I developed
over many years. I get 20,000+ miles on a chain and cassette, and I never need to clean them, as they keep themselves
clean. The process is quick, but the description's length is because I put in a lot of reasons, background, why not to do
certain things. Note that cleaning a gunky chain (which you won't get with this method) makes your cleaning fluid carry more
greasy sand into the inner joints where it does its grinding damage.
- carbon-fiber durability, compared to other materials (while we're on the subject of equipment life): Some
people seem to think carbon fiber is like dried soap suds, super light but easy to break if you just breathe on it wrong.
Early efforts were indeed laughable; but the production problems have been ironed out long ago, and it's long past time to shake
off the bad reputation.
A few articles I bookmarked years ago give the scoop. Carbon technology has further improved since these were published,
whereas steel and even aluminum and titanium technologies were already quite mature by then.
- Will
a Carbon-Fiber bike last?, an article archived from Chain Reaction Bicycle's site, decades ago
- This article,
archived from VeloNews, "Technical Q&A; with Lennard Zinn—Carbon Forks," has answers on testing and durability
from True Temper, Deda, Kestrel, Columbus, Look, Reynolds, Easton, and Time. The short version is that carbon doesn't
fatigue like the metals do, and these manufacturers do not put weight limits on their carbon forks.
- 12
High-End Frames in the EFBe Fatigue Test, article from the 1990's, is about tests on a dozen frames of four
materials. The test consisted of clamping the dropouts and pushing the bottom bracket back and forth 200,000 cycles,
like you'd do in hard, out-of-saddle climbing a mile or two a day for a year, and the force was increased in the middle, at
100,000 cycles. Three of the four steel frames didn't even make it to the middle. By the end of the 200,000
cycles, none of the actual carbon broke, although the Time carbon frame broke at an internal aluminum lug, something none of
the manufacturers use anymore. There was overlap in the materials; but generally, the steel broke first, then the Ti,
then aluminum, and none of the carbon broke. Two of the aluminum frames made it all the way to the end without
breaking. Obviously we wish they could have tested hundreds of models on the market, and many frames of each model,
but who's going to pay for that?!
Sprinting, out of the saddle, with your feet connected, you pull up hard on one side while pushing down on the other, and the
bottom bracket shell get stressed one way and then the other, bending the bottom of the seat tube back and forth, and the steel
eventually breaks. Some anecdotes on carbon versus steel:
- The marvelous steel Mondia I mentioned at the top of this web page is one I hoped would last my whole life. I had to
learn that steel fatigues and breaks though. (Of course in 1977, steel was all we had. Carbon and aluminum were
in their extreme infancy as far as bike frames go, and we hadn't heard of Ti frames yet.) I broke it there at the
bottom of the seat tube, got another tube put in it, and broke it again, all in under 20,000 miles. (And no, there
was not a speck of rust in it.) I have 61,000 miles on my OCLV carbon Trek now, and I know a man who has over 200,000
miles on a carbon Ridley, and he's always training hard and winning races.
- We had a strong neighbor in the late 1980's who broke a new high-end steel frame on his 3rd time out on it, without crashes
or other incident.
- I have lots of friends who've broken steel frames, mostly at the bottom of the seat tube as mentioned, but a few in other
places too. One who used to race has broken several.
- I don't know anyone who's broken carbon, except one who slammed the right seat stay on the corner of a curb in an accident,
fracturing it and leaving a bundle of carbon fibers sticking out, and he fixed it himself with JB Weld and wrapping wire
around it tightly. That was at least ten years ago, and he's still riding the same bike.
- One friend had a rear aluminum dropout's epoxy bond to the carbon chainstay come slightly loose on his Trek Madone, and he
didn't know it until a mechanic pointed it out in the bike shop. The carbon itself is fine though.
- I've broken a lot of metal parts, but never carbon. I did break my OCLV carbon Trek's fork's aluminum steering tube,
the same as what happened to George Hincapie in the 2006 Paris-Roubaix race. It's the only tube in the frame &
fork that's aluminum, and that's what broke:
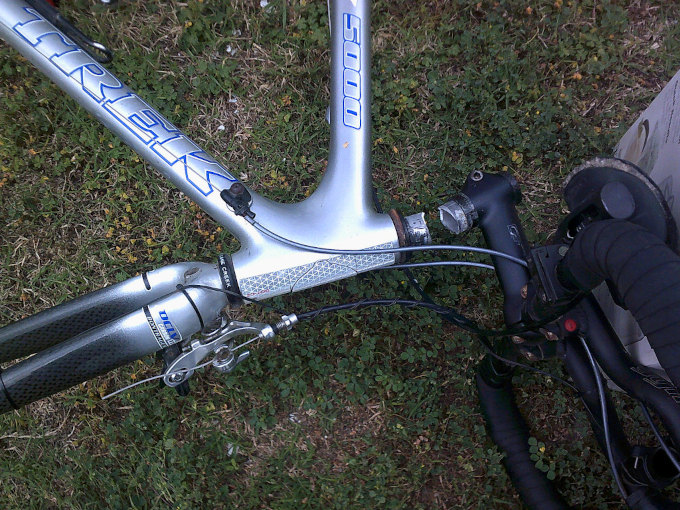
I had just come out of a tight turn on sandy pavement, so I wasn't going very fast, and then headed into a 10% uphill grade
and got out of the saddle to sprint up it. Just a few strokes into it, the steering tube broke, and suddenly there was
no support and no control, and down I went, and hurt my shoulder badly. Basic functions of life ranged anywhere from
extremely painful to impossible. Fortunately, with good nutrition, it healed quickly.
- Our younger son, shown at age 11 further up, was in an accident six years later, where at 25mph he hit the side of a car
that turned illegally across his path. He flew over the car and broke his nose and collar bone. The front wheel
and a few other metal parts were destroyed, but I sent the carbon frame and fork to Calfee for their inspections and tests,
and they found nothing wrong with the carbon, so he's still riding the same Trek Madone today, 16 years later. The
driver's insurance paid for his first year of college.
- This same son is very smart (and has two master's degrees) but not in the sense of being mechanically inclined; and in an
effort to keep his carbon seat post from slipping down into the carbon frame, he tightened the seatpost binder bolt so
tight that it snapped. It didn't hurt the carbon any though. (The solution to the carbon seat post slippage is
three paragraphs down.)
Carbon fiber can be repaired though, by Calfee
and others. Calfee can take a frame that was broken into three separate pieces and make it so you'd be hard-pressed to tell
it was ever broken at all, and it will be at least as strong as it was originally. Just incredible work!
- What gives carbon fiber a feeling of smoothness, even with a super stiff frame, is that it does not add its own
resonances like the metals do. It's not absorbing bumps or buzz, which is why a carbon-fiber seat post doesn't improve the
ride any. (The fork would be the #1 part to make carbon.) When I was describing the matter of resonances and ringing,
the light went on for one man who told me he get it, like when he was at Home Depot to get some pipes, and carrying them to the
checkout, he accidentally let one bump on the floor, and it kept vibrating, buzzing, even though it was no longer in contact with
the floor.
- Carbon seat post slippage is easily cured by putting some kind of non-slip agent on it before installing it.
One thing I've heard recommended is hair spray, and another is blue Loctite. I use the latter. It stays put, and there's
no problem with removing or re-adjusting it later if you want to.
Tandem myths:
- Myth: "You need upper-body strength to captain a tandem." Not true. Learn to control it by
the steering instead, kind of like controlling an airplane by its trim tabs. You cannot muscle it around when there's an
extra 150 pounds back there (of rider plus extra bike weight). That would be all the more true with a triplet, quad, or
quint. If you want the bike to lean more to the right, you turn its head toward the left, and vice-versa.
- Myth: "You can't use aerobars on a tandem." Not true. I was on the aerobars for most of our
tandem miles. You do have to practically learn to ride bike all over again when you get a tandem, because of what I wrote
above, and that an inexperienced stoker can nearly run you off the road even though her bars don't turn. After our first
several rides, I was ready to put it in the dumpster and write it off to experience. That's why Lance called it a "divorce
machine," and why it's been said that your honeymoon is not the time to rent and try a tandem for the first time. We
did eventually get it together though, and put many happy miles on our tandem. We got so we could track-stand on it, and even
when I was on the aerobars, my wife could pop out of the saddle and stand on the pedals anytime without warning me, and it wasn't a
problem.
- Myth: "You put out less power on a tandem if you put the pedals out of phase." Again, not true.
The reason for doing it is of course to put less stress on drivetrain parts that were designed for single bikes, as the pressure
peaks don't coincide, and instead you get a more consistent delivery of power, with one rider filling in at the parts of the pedal
turn where the other rider has very little torque (when his/her crankarms are passing vertical). Would a V8 engine have more
power if it were made such that all eight cylinders fired at once? Of course not. It just wouldn't be as smooth.
- Myth: "When braking down a long downhill, you should alternate front versus back brakes to let one cool while
the other one is doing the braking." Again, no. If you do that, the one that's in use at any given time has to brake
twice as hard, heating up more, so its peak temperature is higher, not lower. If you graph its temperature over time, it would
go above and below the temperature it would have been at with consistent, two-brake sharing.
- Myth: "Let the other person captain (ie, be in front) sometimes!" That doesn't really work, because of
fit. Most tandems are smaller on the back, and our own almost has a range where a person could be too tall for the back and
too short for the front, regardless of adjustments. It'd be hopeless. There's not room in the back for me to not hit my
knees on the bars, and my wife wouldn't be able to reach the bars on the front. The myth however also carries the idea that
being in control is the privileged position. In the typical tandem teams, the captain is usually a man with a lot more
cycling experience than his stoker who might be his wife or son or daughter. When I was on the tandem@hobbes (T@H) forum,
several people who had spent plenty of time in both positions said they preferred being the stoker, because the stoker doesn't have
the pressures that the captain does.
There are more tandem myths, but these are the major ones I can think of. I used to get kind of tired of onlookers telling
me, "She's not pedaling!", thinking they were being funny and I might believe them, but they obviously didn't understand that the pedals
are connected and there's no way for one crankset to turn without the other one turning (unless you spend a lot extra for independent
coasting), or that I could feel every little nuance of her pedaling through my pedals.
Miscellaneous myths:
- Myth: "Traffic-light sensor loops detect magnetic disturbances," or "Bikes don't weigh enough to trigger traffic-light
sensors." Not true; and putting a magnet on your shoe won't help you, nor does the loop sense weight. The
traffic-light controller puts an alternating-current signal, generally in the frequency range of 20 to 200kHz, through the loop of
wire that's tucked into a slot in the pavement, setting up an electromagnetic field. If you put your metal bicycle wheel over
it, the field partially collapses on it, reducing the inductance of the loop, and the controller knows you're there waiting (if its
sensitivity is adjusted to consider bikes—which they aren't always). The most effective (but impractical) way to be
detected would be to lay the bike down over the loop. Otherwise just put the wheel on the cut of the loop, not
inside the loop, nor across the cut, but right on it and parallel to it. If you have carbon wheels,
hopefully they still have something inside that conducts electricity around the perimeter in an unbroken circle. See
this web page and
this
one, and
this
one.
- Myth: "<Frame A> is made by the same place that makes <Frame B>. It's the same thing, but you save a lot
of money because it just doesn't have the prestigious brand name." Nope. I was on the Bicycling magazine forum before
they foolishly shut it down and destroyed all those valuable posts that many of us had bookmarked from bike-industry insiders like
"Velobro." He was a prominent bike-shop owner in Arizona who had looked into getting his own brand of frames made by
factories in the Orient, and had visited them on business trips. He said that although "Frame A" and "Frame B" were made
under the same roof, on parallel production lines, one would be of much lesser quality because the client company negotiated a
price much too low to get the same quality as the prestigious brand.
- Myth: "The 21st century has a corner on great-handling bikes." Nonsense. Even my 1977 Mondia felt like it was
begging to be part of you; and it had qualities that my OCLV carbon Trek, and our son's Madone, don't have. The handling and
feel were wonderful, and it was such a pleasure to ride. I wish I could have all the best qualities of all the bikes in the
same bike. There were some great-handling bikes decades ago.
- Myth: "Aerobars restrict your breathing if they're close together." Take a look at this picture of George Hincapie in a
time trial:
Are his lungs A. between his arms? or B. behind his arms? It's B., behind. (He could get a straighter
back though if the UCI would let them get the saddle more forward, under the rider!) The myth is also not understanding how
the shoulder joints work. Try this at your desk (or wherever you're reading this): Sit with your elbows straight out
in front of you together, bent at 90° so your forearms are pointing up, and inhale absolutely as much as you can. Now
separate your elbows, and see if you can inhale any more. I certainly can't. Separating them does not "open your lungs"
like some people claim.
- Not particularly a myth, but aerobars are usually not set up correctly. The common "Superman" position has two problems.
One is that you cannot maintain that position for long. The other is that you can't get your elbows together for a narrower
wind profile when they're not bent much. I can be comfortable in a very low position on the aerobars for a century ride,
because of a couple of things: one is that I use a reversible seat post (as discussed above) to get my seat way more forward
(but there's still more weight on the rear wheel than the front), and the other is that I'm using Syntace C2 aerobars which put
the arm pads a little bit behind the base bar, rather than directly over it. Ideally you want it so your knees almost
touch the backs of your elbows.
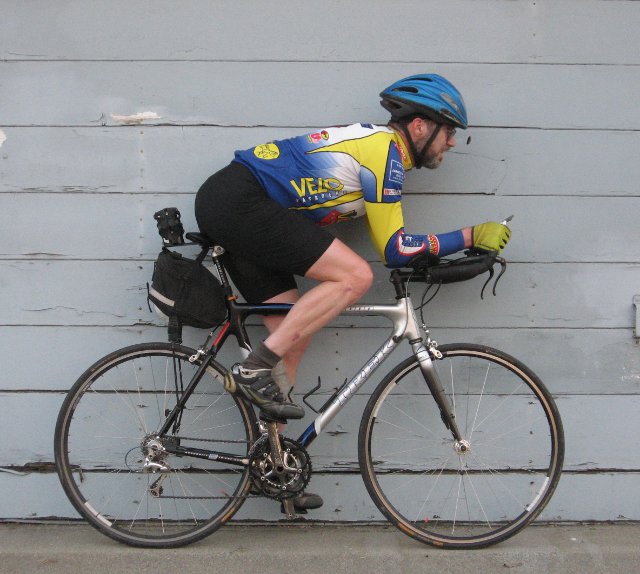
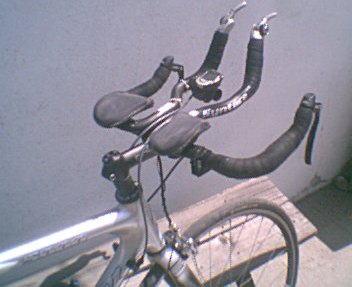
It wasn't natural leaning on the garage door while my wife took the picture; but notice the almost-straight back, in spite of the
low position, and that if I rotate the pedals another 20° forward, my knee would almost touch the back of my elbow. I
ride centuries this way. Before I got the aerobars, my wrists and elbows especially would ache after the first 2-3 hours from
the pounding from our bad roads. It wasn't from a bad fit, but that my bones are very small for my 160 pounds (or maybe 175
back then).
Edit, 10/4/24: I just got an email from Profile Design announcing their new Neosonic/Ergo+/52 GMR aerobar which also has a
decent wrist angle and the pads behind (not directly over) the basebar (as mentioned above). You can see their aluminum
aerobars here. I don't see any that
allow mounting the bar-end shifters on them though—something to consider.
Oh, and please don't call them "clip-ons." Absolutely nothing about them "clips," or ever did! "Clamp-on" would be
more accurate.
BTW, the huge seat bag, which, with the expansion unzipped, has nearly two gallons of space, was for doing 2-3-day unsupported
tours where we only take a few clothes and toiletries and go hotel-hopping. The idea is to travel light and go fast and burn
up the road and have fun, rather than being loaded down with camping stuff and burdened with the work that goes with it. A
holder for two more water bottles is above the seat bag.
- Rotating weight: This myth has been like the folkloric tale of the giant lumberjack Paul Bunyan and his blue ox 'Babe,' where
Paul Bunyan's size is more exaggerated every time it's told. The effect of tires' and rims' weight on acceleration
will be twice that of non-rotating parts; but further in, like hubs for example, the effect will not be significantly
different from that of something like the seatpost. Further, once you're up to speed, an ounce on the wheels takes no more
power to maintain that speed than an ounce on the seatpost does. For most riding (but not crit racing), the valid concern
about weight—regardless of location, including on your body—is about getting the weight up a hill, and secondly, that
the tires' absolute rolling resistance, in force holding you back, is approximately proportional to the load on them, all other
factors being equal.
- Myth: "Cartridge bearings are better." The way they're manufactured restricts the number of load-bearing balls that
can be put in a given space, and the result is a shorter service life.
I believe Shimano is still, after all these years, making cup-and-cone hubs, because if you adjust them correctly, they last
indefinitely, and don't offer any more mechanical resistance to turning. Most people unfortunately fail to realize that the
axle is slightly compressible, and when you squeeze the skewer down, you press the cones toward each other, putting a lot of
pressure on the bearings. When they're properly adjusted, there will be slight play in them when the wheel is out of the
bike, and that play will just barely disappear when you install the wheel and squeeze the skewer lever down. I had to
replace my HG freehub body when the rear wheel had something like 20,000 miles on it because it started slipping, and then
again at 40,000 miles. I had adjusted my bearings properly though, so when I opened things up, I found the grease was still
that bright yellowish-green transparent color that Shimano puts in, not turned dark at all. (I did not clean out and replace
the grease on the side opposite the freehub body after the first time, so it was still there at 40,000 miles.)
- Brake levers whose cables came out the top almost always had the cables much too long! There are tons of these in videos,
but I'm looking for suitable still pictures to post here.
- Hybrid bikes: When I was on the Bicycling forum, we often saw newcomers thinking that hybrid bikes would be more comfortable,
with their more-upright position. Several members kept pointing out that:
- drop bars offer more hand positions and therefore less hand, wrist, and arm fatigue
- the tops of drop bars don't necessarily have to be any lower than hybrid bikes' flat bars
- most so-called hybrid bikes are really just flat-bar road bikes
- true hybrid bikes are a compromise between a mountain bike and a road bike; and rather than being able to fill both rolls,
they really aren't very good at either one.
- "forks," and "front fork": There is only one fork on a bike, and it's always
in the front (so you don't have to specify).
This is a fork for carving the roast or the turkey. It has two tines, and a handle:

This is a fork for a bike. It has two fork blades, and a steering tube (or fork stem):

- "deep-dish" is pizza, like this:

It does not refer to wheels. Usually when people say "deep dish" referring to wheels, they mean "deep V," referring to
the depth of the rim's V shape, like this Velocity Deep V rim's cross section shows (figure the V is upside down):
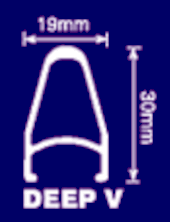
There is a matter of dishing for a wheel though, specifically rear wheels, which refers to the fact that the angle of the spokes
leaving the hub has to be flatter on the drive side, with less of a bracing angle, putting the right-side hub flange farther from
the dropout than the left-side flange is, so there's room for the cassette or freewheel. It has nothing to do with the depth
of the rim! This diagram shows a dished rear wheel with no cassette on the freehub body:
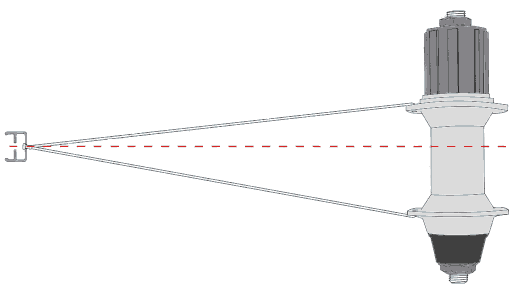
- "double-diamond frame": No, it's a single diamond. (Pardon my crooked lines drawn with the mouse):
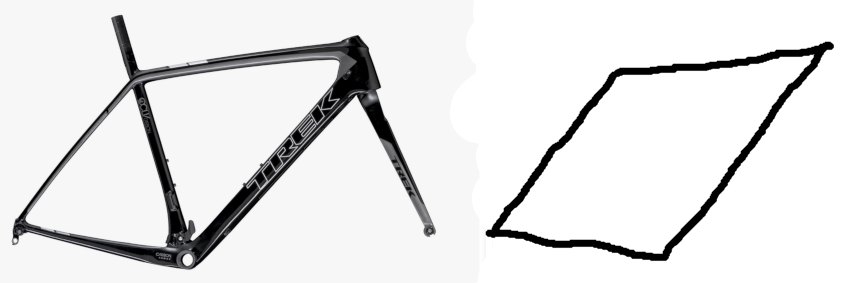
I suppose you could call it a "double triangle," referring to the main triangle and the rear triangle; but it's only one
diamond shape, not double.
- "clip-on" aerobars, referring to the kind you mount on a base bar with mounting hardware, as opposed to integrated
ones: No, there is absolutely nothing about them that "clips" or ever did. "Clamp-on" might be a better term, if a term
is even needed.
- "geometry," used in a way that only considers rider position but ignores handling. I addressed this just
above the picture of our then-11YO son on the tiny road bike, wearing the red jersey, in the middle of this page.
- "cyclist": This one is totally subjective; but I think most serious cyclists would agree that the term
implies some level of proficiency. A woman on a facebook group said we were being snobs, and insisted that anyone who rides a
bike is a cyclist. But would you consider anyone who sits down at a piano and can pick out "Mary Had a Little Lamb" with one
finger a pianist? I don't think so. For someone to be a cyclist, there is some expected, although subjective,
combination of skill level, experience, bike-handling, knowledge of the machine, fitness, etc..
- "rims": When I worked in the bike shop in the 1970's, kids would come in wanting to buy (or just drool over,
in hopes they could soon afford them) fancy colored wheels for their BMX bikes, and they'd ask to see our rims. I knew what
they wanted, but it used to bug me that they couldn't get the terminology right, and I wanted to teach them; so I'd bring out
aluminum rims of all the anodized colors. They'd always say, "No, I mean with guts and everything." My response was
always, "Oh, then you want a wheel. This is a rim!"
- "Entry-level." I hate that term! Before Bicycling magazine foolishly shut down its forum and dumped
tons of great posts from a few super knowledgeable members, new people often came in asking for advice on what to buy for $xxx
(some ridiculously low price), saying, "I don't want to spend much until I find out if I'm really going to like cycling and stick
with it." Then they'd ignore our advice and go buy something cheap, usually from a department store, something that was
sluggish, didn't handle well, parts didn't work well, and it was hard to maintain.
What usually happens then is that they get discouraged, and two years later when the bike is hanging in their garage with two
flat tires and a thick layer of dust and you ask, "Hey, how's the cycling going?", they usually answer, "Oh, I guess cycling just
wasn't for me," not realizing that almost anyone would conclude the same thing if they start with such junk. At the time
(probably around 2012), the bottom of the line of real road bikes from most major manufacturers (Trek, Specialized, Giant, BMC,
etc.), sold in bike shops, cost about $700 IIRC; and since the competition there was pretty stiff, you'd get approximately the
same thing from all of them, meaning one was not not really any better than another, as long as you bought from one of the major
manufacturers of real road bikes, not imitation junk.
We also strongly recommended against buying online, since the newbie needs the support of a real bike shop for proper assembly,
fit, maintenance, and other things, and online sellers like Bikes Direct had tons of bad reviews for problems that had no excuse
to exist. Invariably, someone would chime in with, "I bought a bike from Bikes Direct, and it has been fine," and I would
respond with, "All that proves is that the failure rate is not 100%. That's not very useful information."
Each paragraph is a short story.
One of the coolest things I've experienced was on Glendora Ridge Road in the mountains of Los Angeles county, when a hawk flew beside me
for a while with a live snake in its talons. It was a slightly downhill section after a lot of climbing, so I was going maybe 25mph.
Get Smart comedy TV series: I worked in a bike shop in the
late 1970's. The manager planned a vacation, and left his younger brother and me, both teens, in charge of the shop. Weather
forecasting was not as good yet, and it absolutely poured all week. How much business does a bike shop get in the rain?
None! We finished up the repairs, cleaned up, and had nothing left to do. The repair area was next to the showroom, not behind,
and it had a big roll-up-type door, which we kept open, as it wasn't cold. We stood on a workstand, leaning on our elbows, looking out
at the rain coming down. The water flowing down the gutter went eight feet out into the street. With nothing else to do, the
manager's brother brought in a portable TV the next day, and we watched a marathon of Get Smart, which kept us in good humor all week.
I kind of enjoyed working at the shop. Our clientele was not high-end, and we got a lot of junk to work on; but it was kind of
satisfying to take a low-end 10-speed that had been neglected, and make everything work right again. The one negative was my
painful feet and back from standing all the time. What I would do today is ditch the fancy work stands and just use a display stand
that holds the bike by the rear triangle on the left side, with the rear wheel only an inch or two off the floor and free to turn, like
this:
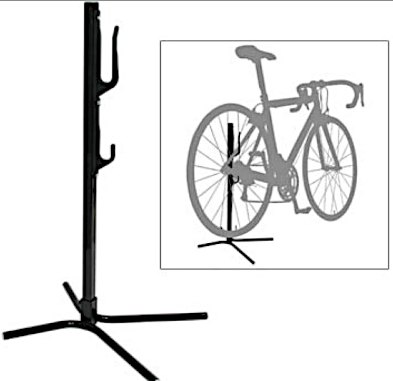
and sit on a low stool to do most work. The front tire rests on the floor; so one of the few things it's not good for is installing
a fork or headset. Shop owner "Velobro" on the now-defunct Bicycling magazine forum likes hanging the bike from ropes, rather than
using a workstand.
We live near a 37-mile long class-1 bike trail. (Class-1 is like a bicycle freeway. There's a picture further down.)
It is not cluttered with joggers, dogs, etc., and it is suitable for as fast as you can go, even with a strong tailwind, for long stretches
at a time. The last time our younger son rode the tandem with me, before he got too tall to fit on it, we headed north, and had an
unusual, strong headwind, so we were pretty slow. I thought, "If this keeps up, we're going to have a wild ride home!"
And we did! We did five miles in nine minutes on mostly flat ground, doing 35mph most of that time, slowing a little only for the
underpasses. This was just before he got his go-fast hormones, too. One man, a pedestrian off to the side, and then another,
just watched us go by, with jaw dropped, apparently never having seen a bike go that fast on flat ground (and maybe never having seen a
tandem either).
Another time, we were on the Palos Verdes peninsula in the Los Angeles area, going down the north side of Hawthorne, where Tiger Woods
had his famous accident. We went 55mph, and could have done 70 if traffic had allowed. I'm glad it didn't, because if I had
gone down it before, I was forgetting that there was a traffic light after the last gentle right curve, and I'm not sure we could have
stopped. Now I know that when you see the runaway truck ramp, it's time to start slowing down.
I was riding the tandem to San Diego with the other son, and in front of UCSD (University of California, San Diego campus), he wasn't
really paying attention when I suddenly hit the brakes hard. He kind of ended up piggy-back on me. We laughed about that for
a long time.
The summer we got the tandem, in 1999, my wife and I were riding north toward Buellton, CA, on the 101 Fwy, in Santa Barbara
County. Bikes are allowed on the freeway there, and we were on a downhill section, going over 50mph, and my wife was still pushing
for more. My own thought was, "I'm almost 40, I've had my thrills, and this is fast enough." A family in an SUV passed us with
about 10mph, their mouths were all open, apparently stunned to see a bike going that fast.
When our sons were in kindergarten and grade school, I used to push them on the trail mentioned above, so they'd get hooked on speed,
and I could get a good workout too. I'd come up behind one and give him a big shove, shooting him past the other one. That gave
away my kinetic energy, so I'd accelerate to get my speed back, and come up behind the other one, and repeat. (I wouldn't push them
if they didn't pedal though.) We'd do this for up to 50 miles a ride. One time we rode to the beach, without my wife, and had
lunch at River's End Cafe, "Just us boys!" I don't remember what we ate, but the food was really bad, super greasy! I didn't
want to ruin the experience for them though, so I didn't say anything. We never ate there again (although it has changed hands since
then, and the food might be entirely different now).
Another time I went down with just the younger one, who was still on 20" wheels. Coming home, just after the steel bridge below El
Dorado park, we came up behind another road cyclist who was all suited up and riding an expensive bike. He didn't see us coming.
I gave Daniel a shove and shot him past this man, who let out this loud groan, as if to say, "Oooooh that hurt!!" (to be passed by an
eight-year-old on 20" wheels). He stepped up his effort and passed him back. For the next eight miles, Daniel and I worked hard
to chase him down, until he exited; but we were always 100-200 yards behind and just couldn't reel him in.
A couple of years later, we went to my sister's in Riverside for Thanksgiving, and took the bikes, arriving a couple of hours early for
a ride, and asked for a recommendation for a suitable loop. Unfortunately there was a downhill part that was a narrow, fast two-lane
road with no shoulder, and we, including our 10YO son on a tiny Schwinn Sprint road bike with 24" wheels, went 40mph. It seemed so
dangerous, but it seemed like it would also be dangerous to slow down because then the traffic would come up on us too fast from behind
and not have time to respond and give us room. Fortunately he didn't crash; but it was sure scary.
This younger son is now married and has two young kids, including a 5YO boy whom he's training to be a cyclist <happyface>.
When he's out on another local trail with him, people have said to him, "Way to go. Start them early;" and "You're a good dad!"
When our sons were 13 and 16, we were climbing Figueroa Mountain Road in Santa Barbara County, CA which goes past Michael Jackson's
Neverland Ranch. A pulley bearing on my rear derailleur
started squeaking badly; so when we reached the fire station in the mountains, we stopped at a picnic table out front and I lubed it with
vaseline from my shorts which I put in the pad to prevent saddle sores. We laughed about that one for a week. (Now I use
aftermarket pulleys with ball bearings rather than sleeve bearings, so there's no binding or squeaking.)
Mountain Ave in Upland, CA turns into Mt. Baldy Rd which climbs up to the Mt. Baldy ski lifts. Perhaps you saw the racers climb
it in the Tour of California. The last couple of miles
are rather insane, with sections of 16% grade. Our son was riding on Mountain Ave, and a man in a car asked if he wanted some Vicodin
(a pain pill with hydrocodone and acetaminophen). Um, no, LOL.
For anyone who thinks Los Angeles county is a concrete jungle, I present some pictures from our local hills and mountains which we
ride. We live close to the middle of the populated part of the county, yet the first picture is at about four miles from home, and
the next one is another half mile up the road.
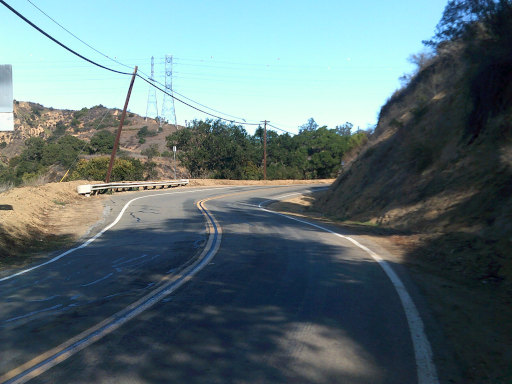
me climbing Turnbull Canyon Rd.
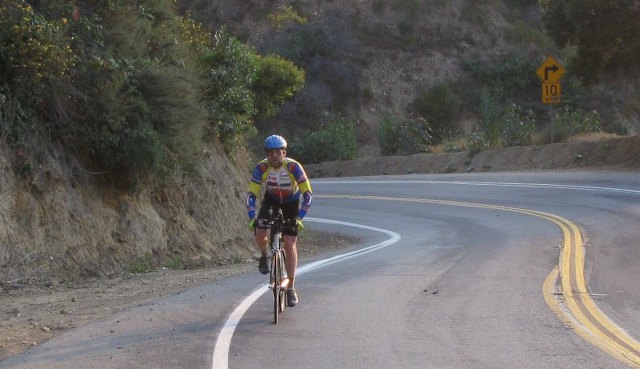
north end of the class-1 San Gabriel River trail, near where it lets you out onto Hwy 39 to start the climb into the mountains
about ten more miles up the road, at the junction of East Fork Rd.
son on Glendora Ridge Rd.
2011 Tour of California racers climbing up the east end of Glendora Ridge Rd.
That's our tiny daughter-in-law in the lower-right corner.
Hwy 2, near Dawson Saddle, in the Angeles National Forest, around 7,000 feet elevation
If you have suggestions for additional links, corrections, or to report dead links, email me at wilsonminesBdslextremeBcom (replacing the
B's with @ and .). Please, no SEO spam! You can use this email address for
individual discussion too. I am open to suggestions for good cycling forums. I was active on Bicycling's forum
before they foolishly shut it down and deleted a lot of great information from industry insiders like Velobro. The only forums I've
been on recently are ones on MeWe (the non-censoring facebook replacement), the "Love to Cycle," "Cycling is Not a Crime," "VINTAGE RACING
BICYCLES," and "AB&C (Accessories, Bikes & Components)" groups; but I got off of MeWe too because I didn't like the changes MeWe was
making.
Posted Aug 31, 2024, last updated Nov 16, 2024.


 .
.


